Friday, January 27, 2012

Random Food Fridays - Artichoke Pesto Chicken Thighs


When I created RFF, it was my intention to share things like this. Yummy, but not really a recipe. Just good ideas for eating.

I never even knew there was such a thing as artichoke pesto until I received some from my brother and his family at Christmas. I had thawed some trusty chicken thighs and needed something to jazz them up. This pesto did the job nicely. You can use all kinds of things to marinate chicken. I suggest that you experiment. When I tasted this (before the chicken, of course), I knew a little lemon juice and cracked black pepper would punch it up that much more.


One really nice thing about marinating meat, is that in most cases, there is enough acid involved that you can plan it and let it wait for a few days in the fridge until you are ready to use it. These make a tasty weeknight dish that is ready in about 20 minutes.

By the way, parchment paper is the bomb. It's one of those kitchen tools that makes me wonder how I ever lived without it.

Artichoke Pesto Chicken Thighs
5 boneless, skinless chicken thighs
1/2 cup artichoke pesto
juice of 1/2 a lemon
several course grinds of black pepper

Mix all the ingredients, cover and refrigerate until ready to use.
Preheat oven to 400 degrees. Place the marinated chicken on a parchment sheet-lined cookie sheet. Be sure to scoop all the marinade and mound it onto the chicken. Bake for 20 minutes. Allow to rest for a bit before serving.

None of these made it to sandwiches, but I bet they would be great!

Friday, January 20, 2012

Random Food Fridays - Fried Rice


When Mr. Dwayne and I were young marrieds, on a strict budget, this dish showed up in the weekly rotation quite often. Back in the 80's (don't worry, I won't hit you with my cane) we tried to keep our grocery bill under $25 per week. It was a lot easier back then! I can remember running to the store with my mother-in-law for milk and seeing her drop $40-$60 just to "pick up a few things" and I was shocked! Now, I am that lady. In fact, I no longer plan every meal for the week and I no longer buy only the food that is needed for the planned meals. I'm livin' large! I'm glad that conditions, whether it's a narrow budget or a farm box with mystery ingredients, have helped to push me towards creative activity.

This fried rice uses bacon, although you could also use diced ham with good results. Really, you could pretty much clean out your fridge on this one. I like the bacon because for a few skinny rashers, you get great tasting fat for stir frying the veg and you get those salty, crispy bits to enrich the flavor.

Fried Rice
3 cups cooked brown rice (1 cup dry, I used local short grain rice)
5 slices of thin bacon
1/2 cup diced onion
1 carrot, grated
1 rib of celery, sliced thin
1 cup frozen peas
2 eggs
About 2 tbsp. soy sauce
About 1/2 tsp. sesame oil

The rice can be cooked in advance and reheated for this. I find that leftover rice keeps its shape better.

In a large skillet, cook the bacon slices over medium high heat until most of the fat is rendered and it is crispy. Remove to a paper lined plate. Add the onion, carrot and celery to the bacon fat in the pan and saute for 2-3 minutes. Add the frozen peas and saute about 2 minutes more. Meanwhile, whisk the eggs and cook in another pan and set aside. When the veg is just tender-crisp, add the rice and toss. Sprinkle with soy sauce to taste. Sprinkle with sesame oil to taste. While the rice is heating, cut up the egg and bacon. When the rice is hot and seasoned to your liking, add the bacon and egg and toss to combine.

Friday, January 13, 2012

Random Food Fridays - Pea Soup

 See that lemon? That's not a mistake. Fresh lemon juice over most bean soups is flavor magic!


Every time a roasted ham enters our lives, I begin to scheme. There are ham sandwiches, of course, with mayo, mustard and my plum and pineapple jam. And, then, there is soup.

Really, there are so many soups that benefit from ham. It took me almost a week to decide what this ham soup would be. Of course, the beauty of soup is that you make it from what you have and then tinker with it until it is what you want. Soup Magic.

 What I had was this: shallots, garlic, parsley, carrots, celery, yellow split peas, chicken base and ham. I'm going to give you approximate measurements, because I expect you to make your soup, not my soup. The most important thing is, MAKE SOUP.

Pea Soup
1 lb. dried peas, picked over and washed (no joke - there could be rocks in there!)
1/4 cup olive oil
a chunk 'o' ham, diced
several shallots, diced
a few carrots, diced
2 stalks of celery, diced
big handful of chopped parsley
1 or two fat cloves of garlic, diced
8 cups water
a scoop of chicken or vegetable soup base
salt and pepper
lemon wedges for serving

Heat a large pot and add the olive oil. Add the veggies and ham and saute for about 5 minutes. Add the peas and water and bring to a boil. Reduce heat to low and simmer for about 90 minutes. Add a spoon full of chicken base and stir. Taste for seasoning and add salt and pepper. I added 1 1/2 tsp. kosher salt and several grinds of black pepper. Continue to cook until the peas are completely tender. Serve hot with a wedge of lemon.

The perfect lunch - soup and Stephen King!

Monday, January 2, 2012

Lovely Lotion

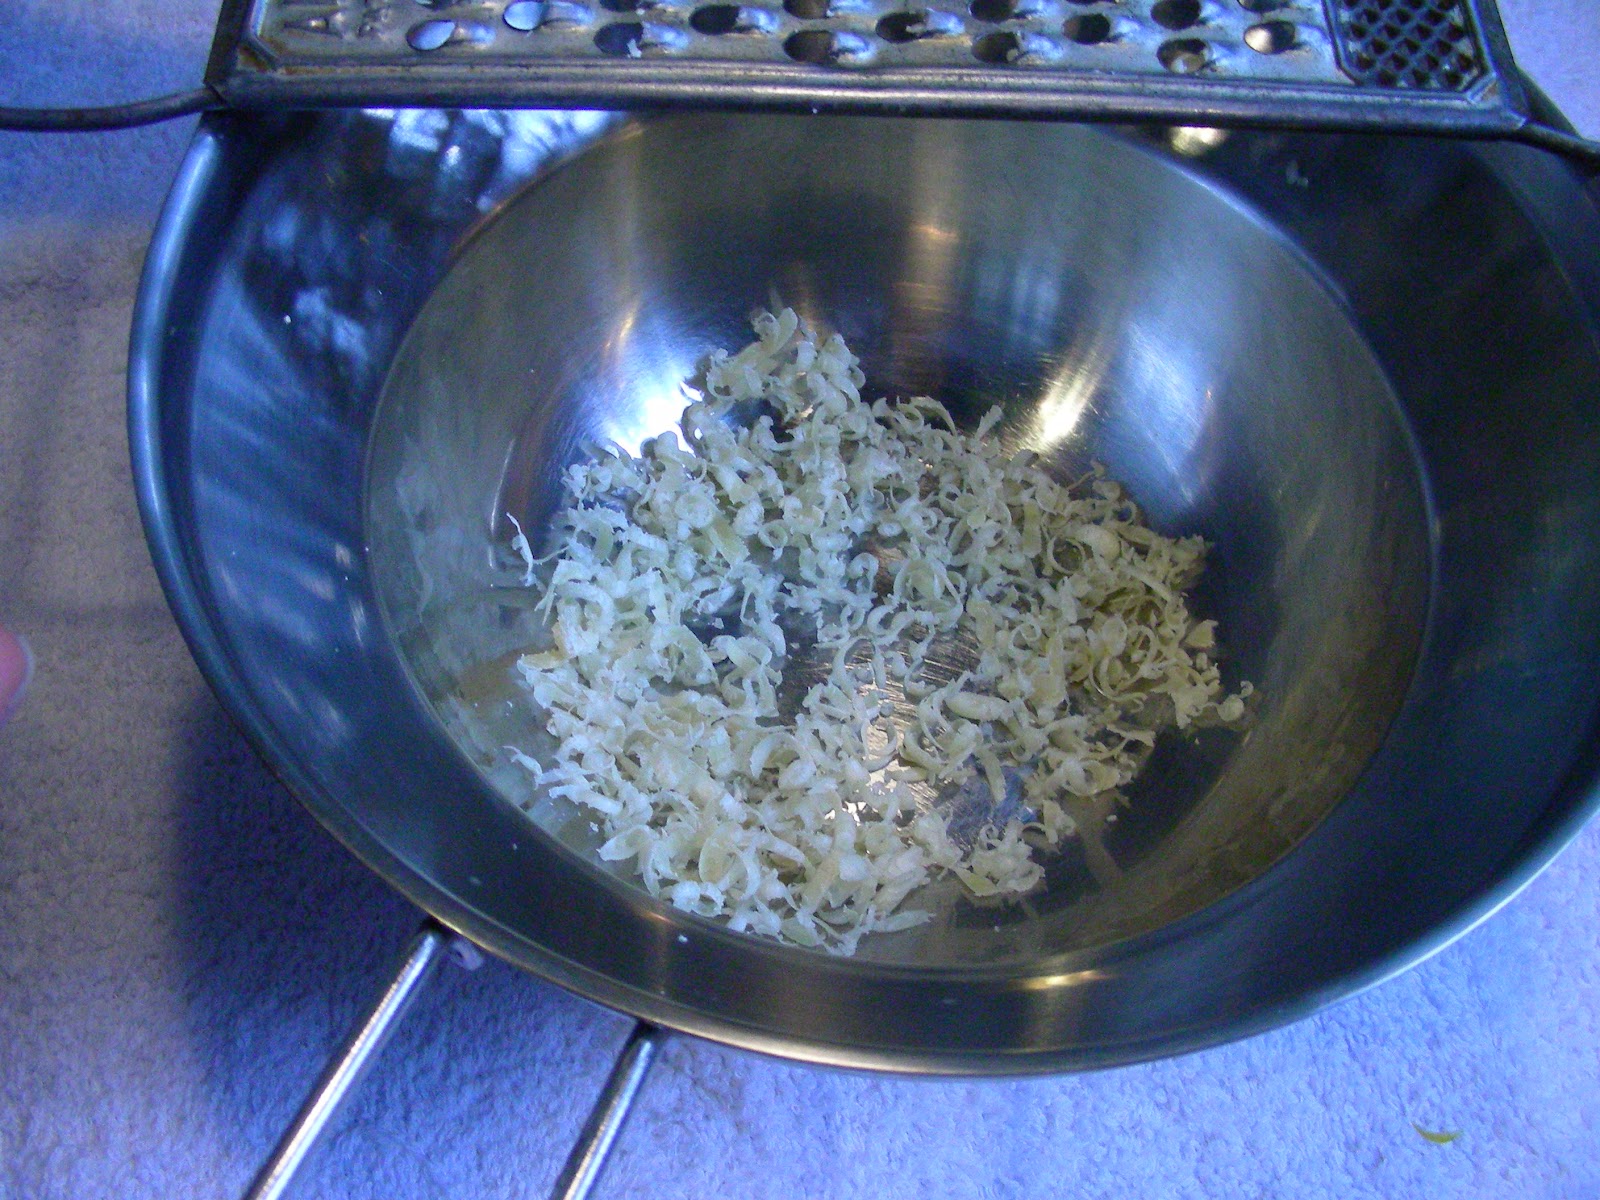
Start by grating 2 tbsp. bees wax into the top of a double boiler. 

 I've been using straight, extra virgin coconut oil as a moisturizer for a while. It smells great and feels great. Smoothing it in after a hot shower just feels like good, solid self care. Sadly, my love of coconut oil has been hard on my clothing. I wanted to find a lotion that would give me the same yummy feel, but soak into my skin in a reasonable amount of time. After a few tries, this Lovely Lotion came into being. As usual, I didn't start from pure imagination. I started with this recipe, but adjusted it to suit my preferences. This is a rich lotion for dry times. It has been a skin saver this winter.

My friend Katy wanted to learn how to make this lotion and volunteered to document the process and did a great job. Thanks for the pictures and the swell day together!

 All of the measurements for this recipe are approximate. 
You will have to eyeball it and trust your intuition.

 While the beeswax is melting over simmering water, "measure" 2/3 cup of extra virgin coconut oil

 "Measure" 3 tbsp. shea butter.

 Allow the wax to melt completely, then add the coconut oil and shea butter. Melt them together.

 While the solid oils melt, measure 1/2 cup of aloe vera gel and 1/4 cup distilled water.

 Pour the melted oils and wax into a tall bowl. Place the glass cup with the aloe vera gel and water into the pan of simmering water to warm slightly. The emulsification will work better if everything is close to the same temp.

 When everything  is around the same temp, use a blender to slowly mix the aloe/water mix into the oils until it becomes white and creamy.

 Add the contents of one punctured vitamin E capsule...

 ...and several shakes of lavender and grapefruit essential oils. 
Whip some more!

 This is enough to fill two half-pint jars. It is quite solid at cool room temp, so I scoop it out with a little pink tester spoon from 31 Flavors. Avoiding dipping with fingers helps it last longer too. There are no preservatives you know!

Here I am, luxuriating in this scrummy lotion! Can you believe I'm an old girl with no make up! I will say that when I do wear make up over it, I have to watch that my mascara doesn't smudge. 

Lovely Lotion
2 tbsp. grated beeswax
2/3 cup extra virgin coconut oil
3 tbsp. shea butter
1/2 cup aloe vera gel
1/4 cup distilled water
1 vitamin E capsule
Several drops each lavender and grapefruit essential oils

See the directions above and enjoy!!!

Sunday, December 25, 2011

My Family's Recipes - Grammy's Peanut Butter Cornflake Candy

One of my dad's presents, Grammy's Candy.

I can remember, as a girl, this candy was always set out at my Grammy and Pappy's house for Christmas. My grandparents lived across the street from each other, so Christmas Eve included a meal and presents at Grandma Betty and Little Pappy's house, then dessert and presents at Grammy and Big Pappy's house. (I don't know how the Pappies felt about their honorifics. Big Pappy happened to be well over 6 feet tall. I know that occasionally I have been Big Susan. I wasn't so crazy about it. The other Susan happened to be right around 5 feet tall.) One year, Big Pappy told me, "I could keep eating this until I'm just about sick!"

We haven't had this candy since Pappy passed away. I was cruising the Internet for recipes (as I often do) and saw one that I knew must be a match. I want to give credit where credit is due - Aunt Altha's Candy - is a tradition from another family. She says that her recipe was given to her mom from her new husband's family after their marriage over 50 years ago. This one has been around for a while. I'm so glad we can all share and recapture the things our families may have lost along the way. The older I get, the more I appreciate the little things that make me think of those I loved.

By the way, this is rediculously easy and delicious.

Grammy's Peanut Butter and Cornflake Candy
1 cup sugar
1 cup light corn syrup
pinch of salt
1 cup chunky peanut butter
1 box of cornflakes (The small one)

Place the sugar, corn syrup and salt in a heavy sauce pan. Heat over a medium heat until the sugar dissolves. Remove from the heat and stir in the peanut butter until well blended. Place the corn flakes into a large mixing bowl and pour the peanut butter mixture over the top. Stir until all the cereal is coated. Line a jelly roll pan with parchment or wax paper. Spread the candy into the lined pan with buttered hands and flatten out slightly. Let cool. Remove from the pan and cut into squares.

Friday, December 16, 2011

Random Food Fridays - Jammin' Sweet Potatoes

 I like to imagine I have followers. The official count is up to 12. If anyone has peeked in here, even semi-regularly, they will have noticed that I love all things sweet potato and butternut squash. Savory or sweet, main dish or dessert, you just can't go wrong with these affordable, nutritional power houses! Of course, we home cooks do like to gild the lily. But, please, in a NON-marshallowy way!
We had a big holiday luncheon at my office yesterday. We have one cranky old stove to accommodate cooking for about 180 people. Whenever we have a luncheon, hot dishes are really better kept in a crock pot. I made these sweets the night before and plugged them in to reheat in the morning. They were nicely heated and delicious after about 3 1/2 hours.

I love sweet and savory together. Not all people do. This is lightly sweet and gets richness from plenty of butter. Of the three sweet potato dishes offered, this one came in a strong second. The dish that went first was a sweet and topped with a crunchy nut topping. The dish covered with marshmallows came in dead last and most of it went home with its provider. If you love pineapple, you will love this dish. If you don't wish to make your own plum and pineapple jam, use straight pineapple or apricot/pineapple from the store.


Jammin' Sweet Potatoes
7 lbs sweet  potatoes
1 tsp. cinnamon
1/2 cup butter
1/2 tsp. salt
1 cup plum and pineapple jam

Peel the sweet potatoes and cut them into large chunks. Steam until tender. Remove to a large mixing bowl. Add the remaining ingredients and mash to desired consistency. You can serve immediately or reheat in a crock pot later.

Serves very many people!


Monday, December 12, 2011

White Chocolate, Raspberry and Almond Bars

So, white chocolate doesn't drizzle. Clumps of white chocolate taste good too.

As I'm preparing for the holidays, I'm reaching another jam crisis in my refrigerator. I'm really working on using all the bits and pieces and unsealed jars from the summer and fall. I really like these Orange Marmalade Bars, and thought it would be easy to rearrange the flavors to accommodate any jam. The version I made this week includes an almond flavored cookie base and red raspberry jam. Unfortunately, I learned that white chocolate can be tricky and doesn't drizzle the way dark melted chocolate will. I just can't make another pan of these right now! I took them to work and still ate too many! I considered naming these OMG Cookie Bars based on Mr. Dwayne's initial reaction, but decided on a descriptive title instead. 

So, here's my plan for the white chocolate next time: Sprinkle the white chocolate on the cookie dough right out of the oven and spread it around a bit while warm. The toasted almonds will have to be the decoration for the top. 

Naturally, cookies like these will only taste as good as the jam you use. I will vouch for the dough base. It is from McCall's Cookie Collection (1965). It can be flavored any number of ways. It can be used as a bar base, a tart shell or as a sliced refrigerator cookie. 

White Chocolate, Raspberry and Almond Bars
2/3 cup butter, softened
1 cup sugar
1/2 tsp. almond extract
1 egg
2 cups flour
1/2 tsp. salt
1 1/2 tsp. baking powder
1/2 cup white chocolate chips
1 cup good raspberry jam
2/3 cup toasted sliced almonds (I use Trader Joe's)

Preheat oven to 350 degrees.

Whip the butter until fluffy. Gradually add in sugar and beat until light and fluffy. Beat in the almond extract and egg. Beat until well incorporated.

Sift the flour, salt and baking powder together onto wax paper or parchment. Gradually beat into the cookie dough. When fully mixed, pour the dough into a greased 9 X 13 inch baking pan. Spread the dough into the pan. (I lined the pan with parchment for easy removal.) Bake in the preheated oven for 20-25 minutes, or until golden brown. 

Remove the dough from the oven and either sprinkle with white chocolate chips and allow them to melt. Spread them a bit after they've melted. Alternatively, if you are brave, you can add the melted white chocolate later. Allow to cool completely. Once cool, spread with the raspberry jam. If you waited to add the white chocolate, do your best to pour or spread it on the jam now. Good Luck! Sprinkle with the almonds. They will slice more easily if allowed to set overnight.