Monday, October 31, 2011

Red Raspberry Jam

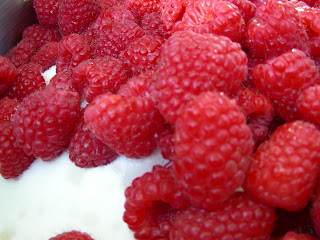
Seems like this was a good year for raspberries. This might just be my perspective because it is the first year I've sought them out in quantity. I thought I might have to go to a you-pick farm, which actually sounds kind of fun. But, the universe contrived to provide me with raspberries easily and affordably. My first batches were early summer fruits that I found at Costco. Remarkably, they were both local and organic. This is one of the great things about living in an agricultural area. Recently, fall raspberries came in and Safeway had them from the same grower at buy one, get two free. These were not organic, but were still local, and I couldn't resist. 

Raspberries are so special and jewel-like. They are Mr. Dwayne's favorite flavor for jam and desserts. One of my co-workers told me about a raspberry/chipotle dipping sauce he had at a local restaurant. He explained this sauce with a convincing amount of rapture on his face. I thought I would experiment with a spicy raspberry jam, but Mr. Dwayne said, "Awe...Don't **** with the raspberries!" Because they are so precious and special in themselves, I bowed to his wishes and made the jam straight-up. (I can always whip up a little chipotle sauce with the jam later!)

This jam is super easy and these berries have enough pectin to set dependably. If you are a beginner, raspberries may be the perfect place to start. You will obtain spectacular results with a minimum of effort.

Red Raspberry Jam
3 lbs. red raspberries, washed and picked over
3 1/2 cups sugar
1/4 cup lemon juice

Prepare 6 half-pint jars and lids and prepare the boiling water bath. Place several spoons on a saucer in the freezer.

Add the raspberries, sugar and lemon juice to a large pot. (I love my 8 quart pot.) Stir to combine and bring to a boil over high heat. Boil, stirring frequently, until the foam subsides and the jam begins to look glossy. (About 220 degrees, if using a thermometer.) Use one of the spoons from the freezer to scoop out a small amount of jam. Place it back in the freezer and allow to cool for a couple of minutes. If the jam does not run off the spoon easily, mounds up when pushed and tastes good, you are there.

Remove the jam from the heat. Remove any foam and stir for a few minutes to distribute fruit. Carefully ladle into prepared jars. Wipe rims and top with lids. Process in the boiling water bath for 10 minutes. Once the jam has processed 10 minutes, turn off the heat and wait for the water to settle down. Carefully remove the jars to a towel lined tray. Do not be tempted to tip off the water! Let cool over night. Check seals and label the next day.

My experience with this jam is that it will solidify over the next few days. I don't mind a soft set and often estimate by eye and taste. When I opened up a jar of this jam several weeks later, it scooped and spread as well as any commercial jam.

Makes 6 half-pints.

Sunday, October 30, 2011

Friday, October 21, 2011

Random Food Fridays - Refried Beans

My second favorite eating utensil is corn chips. (The first, of course, being my hands.) However, I do have to be careful. Portion control is a must. I've learned from painful experience that if I sit down with a bag of corn chips I'm liable to go unconscious and wake up with something resembling a brick of scrapple in my belly and an empty bag of chips on my lap. For some reason potato chips do not affect me in the same way.

This dinner was eaten with corn chips. Mmmmm. When I was a Girl Scout, we did something like this and called it broken tacos. Really, it's more like a seven layer dip. For this meal, I had the beans hot and everything else cold. I packed the same thing with cold beans for lunch the next day and enjoyed it just as much.

I made the refried beans out of cranberry beans. They are a lot like pinto beans, but create a deeper mahogany liqueur and are a little larger. I set the beans to cook in the crock pot in the morning and did the rest when I got home from work. I layered the flavorful beans with garden tomatoes, lettuce, avocado, cheese, Greek yogurt, cilantro and Tapatio hot sauce. These refried beans are way more interesting than any you will get out of a can. Even if you start with canned beans, I hope you will consider doctoring them up as I have done these. They are delicioso!

Refried Beans
2 cups dried beans
2 tbsp. oil
1 onion, diced
4 cloves of garlic, minced
1 tsp. ground cumin
1 tsp. ground coriander
1 7 oz. can diced green chiles
Salt and Pepper to taste

Sort and wash the beans. Place them in a container and cover them with water and allow to soak overnight. (As an alternative method, you can do a quick soak by bringing the washed beans to a boil in plenty of water. Turn off the heat and let them stand at least 1 hour. I think over night soaking makes for a more tender bean.)

The next morning, drain and rinse the beans. Place the beans in a crock pot and cover with water. Use enough water to cover the beans by at least two inches. Set the crock pot on low for 8 hours.

When the beans are nice and tender. Drain them, reserving 1/2 cup of the liquid. Set aside.

In a large skillet, saute the onions, garlic, spices and about 1 tsp. salt in the oil until the onions are translucent and the spices are fragrant. Add the green chiles and the beans and stir to combine. Add enough of the reserved bean liquid to get the consistency you find most pleasing. Simmer for about 5 minutes and adjust seasoning.

I didn't measure my end product, but this makes quite a bit, probably about 6 cups. Leftovers can be frozen for another day. Enjoy!


Friday, October 14, 2011

Random Food Fridays - Crumbly Greens

Well, folks, pesto is making an appearance in the third RFF recipe in a row. When you have a big jar of pesto in the fridge, you've got to use it, right? Pesto ended up in this recipe because I used up all my garlic making the pesto last weekend. This recipe usually calls for garlic, but it got a couple of tablespoons of pesto instead. I have to say, this substitution was a lucky discovery.

This recipe is adapted from Laurel's Kitchen. This is a great book for working delicious variety into your vegetable preparations. Veggies can shine as the star of a meal. As we've moved towards a more healthy diet, I have tended to spend my creative efforts more on the side dishes than the proteins. Also, Mr. Dwayne, who would never eat plain, steamed kale, loves this dish. I predict that you will convert your greens haters with this one! I've tried this with a few different kinds of greens, but steamed curly kale is my favorite here. Kale is tender, but still has a good bite. Kale has less moisture than many other greens and the curly edges of the leaves capture the crumb topping and become nice and crispy.

Crumbly Greens (Susan Style)
3 tablespoons olive oil

1 shallot, chopped
2 tablespoons pesto or 2 cloves garlic, minced

2 (packed) cups steamed kale (stemmed and coarsely chopped before steaming)
3 pieces of fresh whole wheat bread
Salt and pepper

Heat the oil over medium heat in a large, well seasoned, cast iron pan. Add the shallots and saute until slightly softened (about 3 minutes). Add the pesto and stir to combine with the shallots. Add the kale and stir to combine. Place the bread in a food processor and add a good pinch of salt and freshly ground black pepper. Pulse until the bread is broken down into coarse crumbs. Add to the kale mixture and toss to coat. If your cast iron pan is not well seasoned, you may need to add a little more oil if the bread crumbs begin to stick. Allow the crumb-coated kale to brown for 2-3 minutes before each tossing with a spatula. The longer you cook it, the more crispy it will become.

Serves 2 to 3 as a spectacular side dish.

Sunday, October 9, 2011

Fig and Orange Marmalade

Everything has been late this year. It's October, but the farmers' market is still looking like early September. Tomatoes, cucumbers, corn and peaches are all still coming in like gangbusters. This week I even saw baskets of figs. If you read this post, you know how I feel about figs. They are a miracle of nature. I was lucky enough to visit my friend Diane's fig trees a few weeks ago. She lives by the river and her trees have access to a pretty high water table. These generous trees not only provided figs, but held up wild grapes. There were beautiful purple clusters hanging down like Christmas tree ornaments.   While there are many advantages to living by a river, you must share your land's bounty with the local wild life. Deer, raccoons and birds all feast on these fruits. I wasn't able to reach any of the grapes. I don't think my reach is any higher than a deer's. I was lucky to find a couple of pounds of figs that had just ripened and had not yet been enjoyed.
 I was contemplating making a third batch of fig and balsamic jam, but didn't have enough figs and I had run out of the very good balsamic vinegar I had been using. So, I decided to go with another classic pairing - figs and oranges.
When you open the jar, the orange scent hits first. When you taste, the orange and fig flavors meld with the figs bringing their own velvety, crunchy texture. Figs are the beaded velvet ball gown of Nature! The color is reminiscent of a late evening sunset. Enjoy!

Fig and Orange Marmalade
6 cups chopped figs
4 oranges (I used organic Valencia)
1/2 cup lemon juice
4 cups sugar

Place the chopped figs, lemon juice and sugar in a large non-reactive bowl and let macerate while you prepare the oranges.

Remove the orange zest. I used a peeling tool that cuts into little strips. Place the orange zest in a sauce pan and cover with cold water. Bring to a boil and simmer for 30 minutes. Drain.

Cut the remaining peel off the oranges and remove the segments without getting any of the pith or membranes. Be sure to do this over the bowl so you capture any juices. Squeeze any remaining juice out of the peels. Stir the orange zest and orange segments and juice into the fig mixture. You can store this in the fridge until you are ready to jam. (I often do weeknight canning in increments.)

Prepare the boiling water bath and place some spoons on a saucer in the freezer. Prepare the jars and lids.

Place the fig and orange mixture in a large pot and bring to a boil. Boil until it is thick and glossy. If you wish, you can scoop out some of the foam and seeds that float to the top as you stir. I fished out about a quarter cup of seeds! My thermometer is broken, so I'm depending on how the jam looks and tastes. When the jam begins to thicken and the foam subsides, begin testing with your frozen spoons. When the jam mounds nicely and runs off the spoon slowly instead of fast, you are pretty much there. There is a certain mouth feel that tells me when it is done. Taste as you go, but let it cool first!

When the jam is ready, carefully ladle it into the prepared jars. Wipe the rim with a clean, wet cloth and top with lids and rings. Process in the boiling water bath for 10 minutes. Turn off the heat and let the jars sit in the water bath a few minutes more. Carefully remove the jars to a towel lined tray. Allow to stand over night. Check the seals and wipe away any remaining moisture and label.

Makes 7 half pint jars.


Friday, October 7, 2011

Random Food Fridays - Easy Pesto Aioli


Friday night has become date night for myself and Mr. Dwayne. This might be one of the reasons my Random Food Friday posts have become a little irregular. Date night usually consists of a nice meal and some fun errands. Don't ask me how, but Mr. Dwayne makes errands fun. We can't be the only long-term couple that gets excited about a trip to Costco or the farmers' market.

This week was super busy and work has supplied me with plenty of urgency. (Trying to quit that, by the way. The urgency, not the job.) We had already eaten so many lunches and dinners out this week that we decided what we wanted for date night was a simple night at home. Here we have chicken thighs again. (Costco has now has organic boneless, skinless chicken thighs.) I simply seasoned them well with salt, pepper and garlic powder and seared them off in a large cast iron skillet with a little olive oil. What made this meal yummy was the assembly of sandwich components. 

These made for one fine sammy:
Bella Bru sour dough
Perfectly ripe avocado
Perfectly ripe tomato
Sweet red onions
A little lettuce
and (drum roll, please...)
Pesto Aioli

So, borrowing from this post, stir together equal parts pesto and mayo and spread generously.
Enjoy!

One of the reasons I like to enjoy really good sandwiches in the privacy of my own home.