Thursday, October 21, 2010

Rustic Apple Pie for Dwayne

There was not Random Food Friday last week because I was a little busy. (I've got something good for tomorrow.) Last Friday I had what we hoped would be a small surgery, which turned out to be a medium surgery, with a few bumps in the immediate recovery. I'm feeling a lot better now. I should feel even better in the weeks and months ahead.

So far my recovery has consisted almost entirely of watching Food Network, Cooking Network and cruising all the favorite blogs of my favorite bloggers. What a rich world of communication these interwebs offer us! So many thoughtful and talented people who are willing to share their knowledge and ideas. I'm so encouraged by what I have seen and read. I commented, when I started this blog, that I'm not any kind of purist and I probably never will be. But, I appreciate learning from thoughtful people who've spent time researching the facts so they can make considered decisions about food. I also started reading In Defense of Food by Michael Pollan. I like his plan - Eat food. Not too much. Mostly plants. Simple enough, right. A few years ago, I figured that my idea of good food meant eating something that had been alive recently. There's a lot of room in that definition. There's plenty of room for treats that can bring some real joy and a celebration of the wonderful generosity of our natural world. Here's a perfect celebratory treat for fall - apple pie.

Dwayne and I went to Apple Hill a couple of weeks ago and we came back with two big bags of Romes. I had thought about making this Apple Slab, but the more I talked with Dwayne, the more I realized that he didn't want the fancy additions, he just wanted the fruit to crust ratio to be in favor of the crust. Ok!

Last Thursday, on the day before my surgery, I took a vacation day and did a frenzy of nesting. I cleaned the whole house, caught up on the laundry and watering and cooked a gigantic mountain of food. I had also received my CSA box earlier in the week and I was determined to cook all that food and have it standing by for my recovery. Our dinner that night started to take on the magnitude of a sort of last meal. I made turkey meatloaf, cream cheese mashed potatoes, crispy crumb kale, green bean salad and this delicious apple pie.

In the first photo, above, you will see some of the tools I've inherited that make pie making easy. These are things I would not have thought to purchase, but were given to me by my wise, pie-making elders. The Foley Pastry Frame was my great grandmother's. I'm surprised these aren't in common use anymore. The frame stretches a sheet of canvas tight. The canvas is printed with the diameter needed for different sizes of pie tins. It also came with the little cotton sleeve you see on Great Grandmother's rolling pin. With these tools and flour, nothing sticks. It's amazing. Then, you just throw it in the wash and put away for another day. The flat whisk is a tool I received from my mother-in-law Pat. She was quite the pie maker in her day. That flat whisk is the perfect tool for cutting in the solid white fat component of your pie dough. The wire grater you see in the bowl was also my great grandmother's. It is perfect for grating chunks of very cold butter into the flour and shortning mix. Leaving the butter in small chunks is what causes flakes to form in the crust. If you want to get down with pie making, I can highly recommend all of these old-fashioned tools.


Here is the finished product. I used what would have been crust for two double crust pies and baked it all on a cookie sheet with 8 cups of sliced apples. The crust came out crisp and flaky and the apples were delicious. There are different schools of thought about pie crust. My hubby's side of the family prefers a very short (high fat) crust that is tender and crumbles almost like a cookie dough. To this end, they use a higher proportion of fat, omit butter and handle the dough as little as possible. I prefer and crust that has more bite and forms crisp and flaky layers. Also, for flavor, butter can't be beat. My experience is that combining a solid white fat, that is well incorporated into the flour, with chunks of suspended butter is the winning combination. When I say, solid white fat, I mean a fat that is solid at room temperature and does not include water and other solids, as butter does. The reason butter works to make those magical layers is that the water in the butter becomes steam as it bakes and causes the layers of flour to separate. I've had good success with shortening (non-hydrogenated please) and extra virgin coconut oil. I imagine lard would be pretty darn good too (our grandmas knew what they were doing). But with such good results already, why go out of my why to buy and use lard?
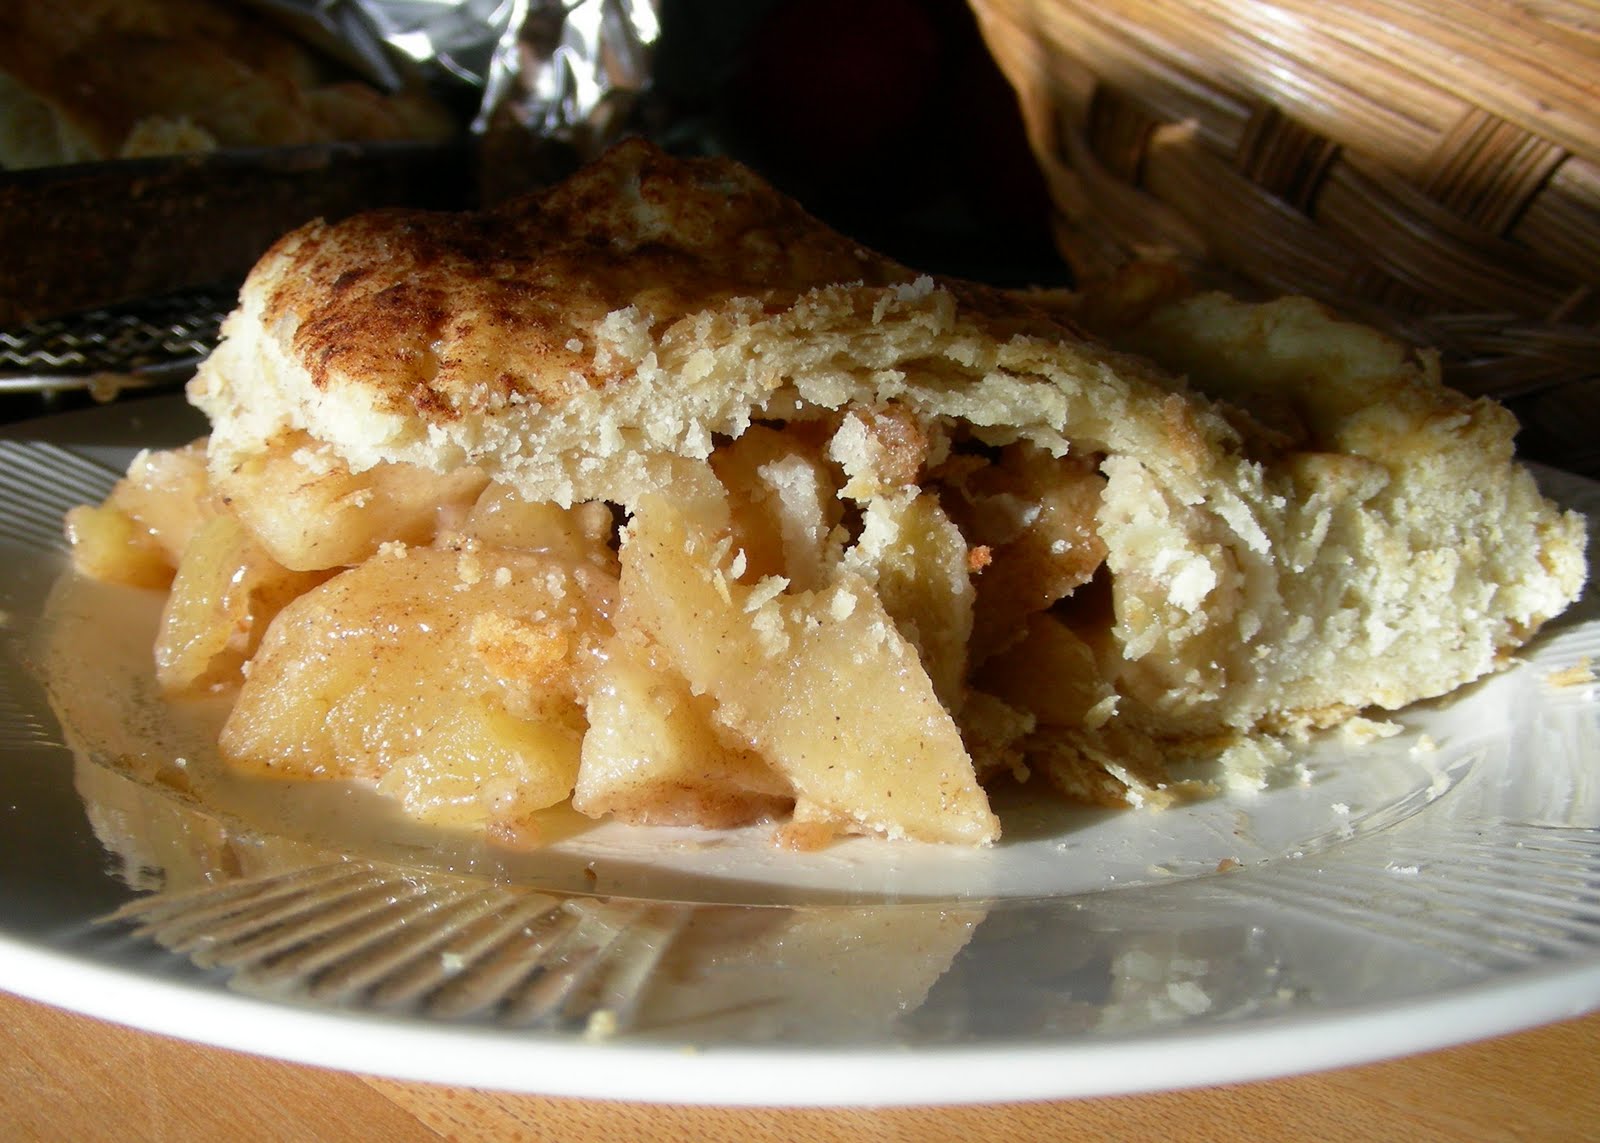
Rustic Apple Pie
For Crust:
4 cups all purpose flour
1/2 tsp. salt
1 cup shortening
1/2 cup butter
10 tbsp. ice water
cream, sugar and cinnamon for topping

For Filling:
8 cups peeled and sliced apples
3/4 cup sugar
dash of salt
2 tbsp. flour
1 tsp. cinnamon
2 tbsp. butter

Method:
Place flour and salt in large mixing bowl. Add shortening and cut it into the flour until is resembles course crumbs. Take very cold better and either grate it into the flour mixture, or cut it into pea sized cubes on a cutting board and then add to the flour. Toss the butter pieces so that the flour coats them and they be come well distributed. Add ice water by sprinkling over the flour and tossing the flour mixture until is starts to hold together. The amount of water you use will depend upon humidity and the dryness of your flour. This day I ended up using 10 tablespoons of ice water. Sprinkle 1/4 cup of ice water first then add the rest one tablespoon at a time until the dough starts to stick together. Begin to press the dough together by hand. It may still appear dry, but as long as the dough sticks to itself, that is enough water. It is OK to do a few folding and kneeing motions, maybe 4 to 6 times. Do not over work. You are just trying to get the layers to form and the dough to form a ball. The butter will remain visible. Once a ball is formed, wrap in plastic wrap and keep cold until the apples are ready.

Peel and slice the apples. I don't think it pays to be too careful here. As long as they are all around the same size they will all be done at the same time. In a large bowl, mix the apples, a dash of salt, 2 tablespoons of flour, the sugar and cinnamon and toss to coat. My apples were quite tart and firm. If yours lack tartness, add a little lemon juice.

Divide dough. Flour the dough and surfaces and roll half of the dough into a rough rectangle that is a little less than 1/4 inch thick. Gently lift the dough over the rolling pin and transfer to a cookie sheet. Pile the apples into a mound in the center of the dough. Dot the apples with the butter. Leave a good inch uncovered by the apples. Brush the uncovered edge of the dough with cold water. Roll out remaining dough and gently lift it and cover the apples and bottom dough. Press the edges together and roll edges then crimp the dough. Brush the crust with cream, half and half or whole milk. Sprinkle generously with sugar and sprinkle with cinnamon. Cut a few slits in the center to allow steam to escape.

Bake in a preheated 400 degree oven for about 50 minutes. Allow to stand for a couple of hours before serving so the filling can have a chance to set.

Random Food Fridays - Green Bean Salad

I feel very fortunate that I love veggies. I love to bake. I love to jam. And, although I love careful and artful technique, fresh and simple often wins the day. I can tell you that I made just as many yummy noises over this salad as I did over last week's apple pie. This is adapted from a recipe by Terri McKay on allrecipes.com. I actually like to multiply the dressing by about 8 and keep it on hand. I like using toasted sliced almonds instead of sesame seeds, mostly because I love toasted sliced almonds. They add the perfect crunchy kick and compliment the toasty flavor of the sesame oil. The nuts also add enough protein that I can take this for my lunch without much else. I also love to make this with fresh asparagus.
Green Bean Salad
1 lb. fresh green beans (or asparagus)
1 tbsp. soy sauce
2 tsp. canola oil
1 tsp. sugar
1 tsp. apple cider vinegar
1 tsp. sesame oil
1/4 tsp. salt
freshly cracked pepper to taste
1/4 cup sliced toasted almonds

Clean and steam green beans until tender crisp. Plunge into ice water. Drain well.
Mix dressing ingredients and toss with green beans. This benefits from marinating some time before serving. Sprinkle with toasted sliced almonds just before serving.

Enough dressing to have on hand:
1/2 cup soy sauce
5 tbsp. canola oil
2 tbsp. + 2 tsp. sugar
2 tbsp. + 2 tsp. apple cider vinegar
2 tbsp. + 2 tsp. sesame oil
2 tsp. salt
freshly cracked pepper to taste

Mix all ingredients and store in an airtight container in the fridge. This dressing is highly flavorful and salty, so use a light hand when dressing your salad.

Thursday, October 7, 2010

Blackberry Jam

A sunny fall morning with toast, jam and coffee. Ahhh. Blackberry jam can be especially satisfying because it can be a long-term labor of love. This batch of jam is the culmination of 3 or 4 berry picking excursions. I've learned to use my insulated lunch box to pick the berries because it will hang over my arm, leaving two hands free for managing the prickly canes.

This recipe is essentially the one in the Sure Jell low or no sugar box. They reccommend mashing some of the berries and leaving some whole. If the seeds in your area are tender enough for that, go for it. In my area the seeds seem to be very hard. I try to get as many out as I can with a food mill. A few always make it through, but I don't want to go so far as to strain it.

A word of warning about blackberries - they stain. Observe my sink. It's two weeks and several scrubbings later and it is starting to fade. The plastic lining of my lunch box also took some time to recover.

Here are my happy little jars at the end of the day. This canning day, I made the cherry vanilla preserves previously featured, this blackberry jam and a mixed berry jam. I was tempted to label the mixed berry jam "Freezer Berry." I had a couple of cups of blackberry pulp left and threw in a frozen bag of blueberries and a frozen bag of cranberries to bring it up to the volume for the pectin box recipe. Both berry jams came out rather stiff. I think that the next time I use seeded berries I will try doing it without pectin. There seems to be plenty of natural pectin in the berries. I've commented before that I'm getting a real eye for determining when things reach the proper jelling consistency. With pectin that control is taken away. You boil for one minute, period. If anyone has used pectin while flouting the rules, I'd like to hear how things came out.

Blackberry Jam
5 cups of prepared blackberry pulp
4 cups sugar
1 box Sure Jell low or no sugar pectin (the pink box)

Prepare jars, rings, lids and boiling water bath.

Place berry pulp in a large pot. Combine 1/4 cup of the sugar and the pectin and stir into the fruit. Bring mixture to a full rolling boil. Quickly stir in remaining sugar. Return to boil and once it reaches a full rolling boil that cannot be stirred down, boil for one minute. Remove from heat and stir for a minute to distribute any seeds that came through the mill. Ladle into jars. Wipe rims and cover with lids and rings. Process in boiling water bath for 10 minutes. Carefully remove jars and set them on a towel. Allow them to stand overnight before labeling. Makes 7 half-pint jars.

Random Food Fridays - Regular Old Coleslaw

You may have seen the coleslaw that appeared on my pulled turkey sandwich earlier this week. I decided to share my basic coleslaw with you. The only difference is that tonight I forgot the carrots. It's just for color anyway, unless you add enough for taste, then it's carrot salad.


I like making coleslaw right before eating it. That way everything stays nice and crunchy. What you see below is my V-Slicer. V-slicers are the low-rent cousin of the mandoline. They are really good for getting very thin and even slices or shreds. I have a food processor and use it, but I really prefer the low-tech ways for small jobs - fewer parts to clean and a lot less noise. I was trying to remember how I got this slicer. I remember first seeing one like it at my in-laws house. I honestly can't remember if Pat gave it to me or I saw one at a yard sale later and bought it. I know it didn't buy it new. Pat has given me so much over the last 28 or so years, it's hard to remember everything. Even now she tries to give me things when we visit. It's in her heart to share with her loved ones.


Coleslaw

1/4 of a head of cabbage, sliced very thin

very thin slices of red onion, to taste (for me this is about 8 swipes on the slicer)

1/3 cup olive oil mayonaise

1 tbsp. rice vinegar

2 tsp. sugar

1/2 tsp. celery seed

1/2 tsp. salt

some grinds of black pepper

Toss everything together and serve as a side dish or heaped on a sandwich.

Serves 2 at my house.

The whole thing has 282 calories.

Monday, October 4, 2010

Pulled Turkey for Sandwiches

I love my crock pot. Love, Love, Love.

This is a variation of my Jam Sauce recipe, but instead of my own jam, I used whole cranberry sauce with turkey thighs. Turkey thighs are great for the crock pot. They are leaner than pork, but still have enough connective tissue to melt down nice and tender. As with all sandwiches, everyone can build their own. I like this with Tapatio hot sauce and a scoop of coleslaw. Dwayne likes his with a slice of provolone. This recipe makes a lot because I have a seven quart crock pot. Adjust down if your crock pot is smaller.

Pulled Turkey for Sandwiches
6 turkey thighs with the skin removed
1 can of whole berry cranberry sauce
2 tbsp. Worcestershire sauce
1 tbsp. dried diced onion
1/2 cup bottled chili sauce

Spray your crock pot with non-stick spray. Season the turkey thighs with salt, pepper and garlic powder. In a medium bowl, mix the cranberry sauce, Worcestershire sauce and dried onions and chili sauce and stir to combine. Place some of the sauce in the bottom of the crock pot and top with one layer of thighs. In my crock pot one layer is two thighs. Continue to layer the sauce and seasoned thighs topping with remaining sauce. Cover with the lid and set to cook on low for 6-8 hours. Just before serving, use tongs to pull out the thigh bones. They should come loose easily. Mash the meat around with the tongs until it is shredded. If you wish, prop the lid with a spoon and let it simmer for another hour or so on high to condense the sauce a bit. Serve on fresh kaiser rolls with the toppings of your choice.

Makes enough to eat leftovers all week or have a pretty big party.


Sunday, October 3, 2010

Cherry Vanilla Preserves

This was my scrumptious breakfast this morning. Cherry preserves with fragrant vanilla and Greek yogurt. It's been a while since I've been able to get the water bath rolling.

You may have noticed that I didn't have a Random Food Friday this week. I was super busy, didn't get to the store, and my eating just wasn't very interesting. I'm glad to have a preserve to offer this week. Random Food Fridays will likely end up being on random Fridays and not every week.

The cherries for this preserve came from our friends Brian and Rosie. Rosie puts up some mighty fine preserves herself. She's been gracious enough to share some of the bounty of their little orchard with me this year. She's contributed fruit to my orange and grapefruit marmalades, these cherry preserves, and a cobbler to two. Thanks Rosie!

The heady vanilla fragrance comes from this very special little bean. Our friends Vicki and Bob recently took an awesome cruise in the South Seas. She thoughtfully brought back some vanilla beans from Huahine in French Polynesia. She was able to purchase them from the growers and learn about how they grow and are prepared for market. I've very grateful to enjoy such a special treat.

One of the great things about returning to canning after a break is that I realize how much I've learned. This cherry preserve was made without added pectin. I like pectin for some fruits, and it certainly cuts down on the time standing and stirring over a hot pan, but making preserves without pectin offers more freedom. I can use any amount or combination of fruits and any amount of sugar that suits me. I just have to insure proper acidity and use a thermometer and my eyes to tell when it is at just the right stage.

Cherry Vanilla Preserves
3 lbs. plus 9 oz. pitted and halved cherries (ball park it - this just happens to be the amount I had)
1/4 cup lemon juice
1/4 cup water
3 cups sugar
1 vanilla bean

Wash and prepare 5 half pint jars, lids and rings. Begin to heat the boiling water bath.

Place a few saucers in the freezer.

Split and scrape the seeds out of the vanilla bean. Add all the ingredients to a large stock pot. Bring to a boil and boil gently until it reaches about 222 degrees, stirring frequently. (My thermometer may be wonky, but my preserves always start to jell before I reach this temp. Watch closely as you get to about 218 degrees. 222 is the official "jell stage" temperature.) Test the preserve by scooping out a teaspoon and placing it on a frozen saucer. If it bunches up when pushed, it is done. Remove the vanilla pod. Remove the pot from heat and stir gently for a minute. This helps to distribute the fruit.

Carefully pour into prepared jars. Wipe rims and cover with lids and rings. Carefully lift into the boiling water bath. Process for 10 minutes. Carefully remove and place on a tea towel. Let stand overnight before labeling the jars.

YUM!

Thursday, September 23, 2010

Random Food Fridays - Smoked Meat and Guilty Pleasures

Ahhh. Smoked meat. I know that my ancestors cooked meat over an open flame and likely smoked and/or salted it for preservation. Is there a smoked meat gene? I mean, I've known a few vegetarians who eat bacon. Bacon! (Bacovegetarians?) I suspect it is in most of us to like the smell of smoke and meat. I don't eat meat on a daily basis, but when I do, it has often come into contact with smoke and flame of some sort. We enjoy the great smoked meats from the Roxie Deli in our neighborhood, but we also like putting the burn to our meat at home. One of my favorite guilty pleasures is hot dogs. A good quality dog, juicy and garlicky, is the perfect delivery system for most of my home-canned condiments. A good hot dog is sausage after all.

The meal above features good turkey smoked sausages along with tangy greens and the best baked beans ever. The greens were prompted by my farm box. I had no room in my fridge and needed to cook up a lot of the veggies quick. These greens feature sauteed green apples, shallots and turnips along with the turnip greens and a big bunch of chard. They are seasoned with a bit of apple cider vinegar and a pinch of sugar. Yum!

The beans are left over from my parent's big 50th wedding anniversary party. I'm the only one who eats beans at my house, so a big pot of beans usually gets made for a big occasion. These also contain enough delicious fat that eating them all by myself would just be a bad idea. I've got to spread the calories around! I made two big crock pots full and had one leftover. If you try this recipe, you can add spice if you like. I knew that I needed to make it mild for the party, so I set a bottle of Tapatio hot sauce on the side. That's the red stuff you see on my dinner.

These beans have so much meat, they are almost anti-vegetarian. I think my vegetarian friends might consider making this dish with a veggie substitute that would add a smoked flavor. I've had good results from adding texturized vegetable protein bacon bits. When they cook in liquid, the texture is very much like real bacon.

Baked Beans
1 lb. of bacon
1 lb. of ground beef
8 oz. ham
1 purple onion, chopped
2 tbsp. chili powder
1/4 tsp. garlic powder
1 16 oz. can pinto beans
1 16 oz. can great Northern beans
1 16 oz. can red kidney beans
1 16 oz. can garbanzo beans
1 16 oz. can black beans
1 large can baked beans
3/4 cup ketchup (I used my homemade fruit ketchup!)
1/2 cup molasses
1/4 cup packed brown sugar
2 tbsp. Worcestershire sauce
1 tbsp. yellow mustard
1/2 tsp. black pepper

Chop the bacon. Cut the ham into small cubes. Heat a large pot and brown the bacon, ground beef and ham together. Do not drain. When the meat is cooked through, sprinkle with the chili powder and garlic powder and stir to combine. Open all the bean cans and drain the kidney and garbanzo beans and add to the meat. Add the remaining beans along with their liquid. Add the ketchup, molasses, brown sugar, Worcestershire sauce, mustard and pepper. Stir to combine. Place bean mixture in a crock pot and set to cook on low all day and eat when it is convenient for you. Serves a whole bunch of people and has numerous calories.