Sunday, June 5, 2016
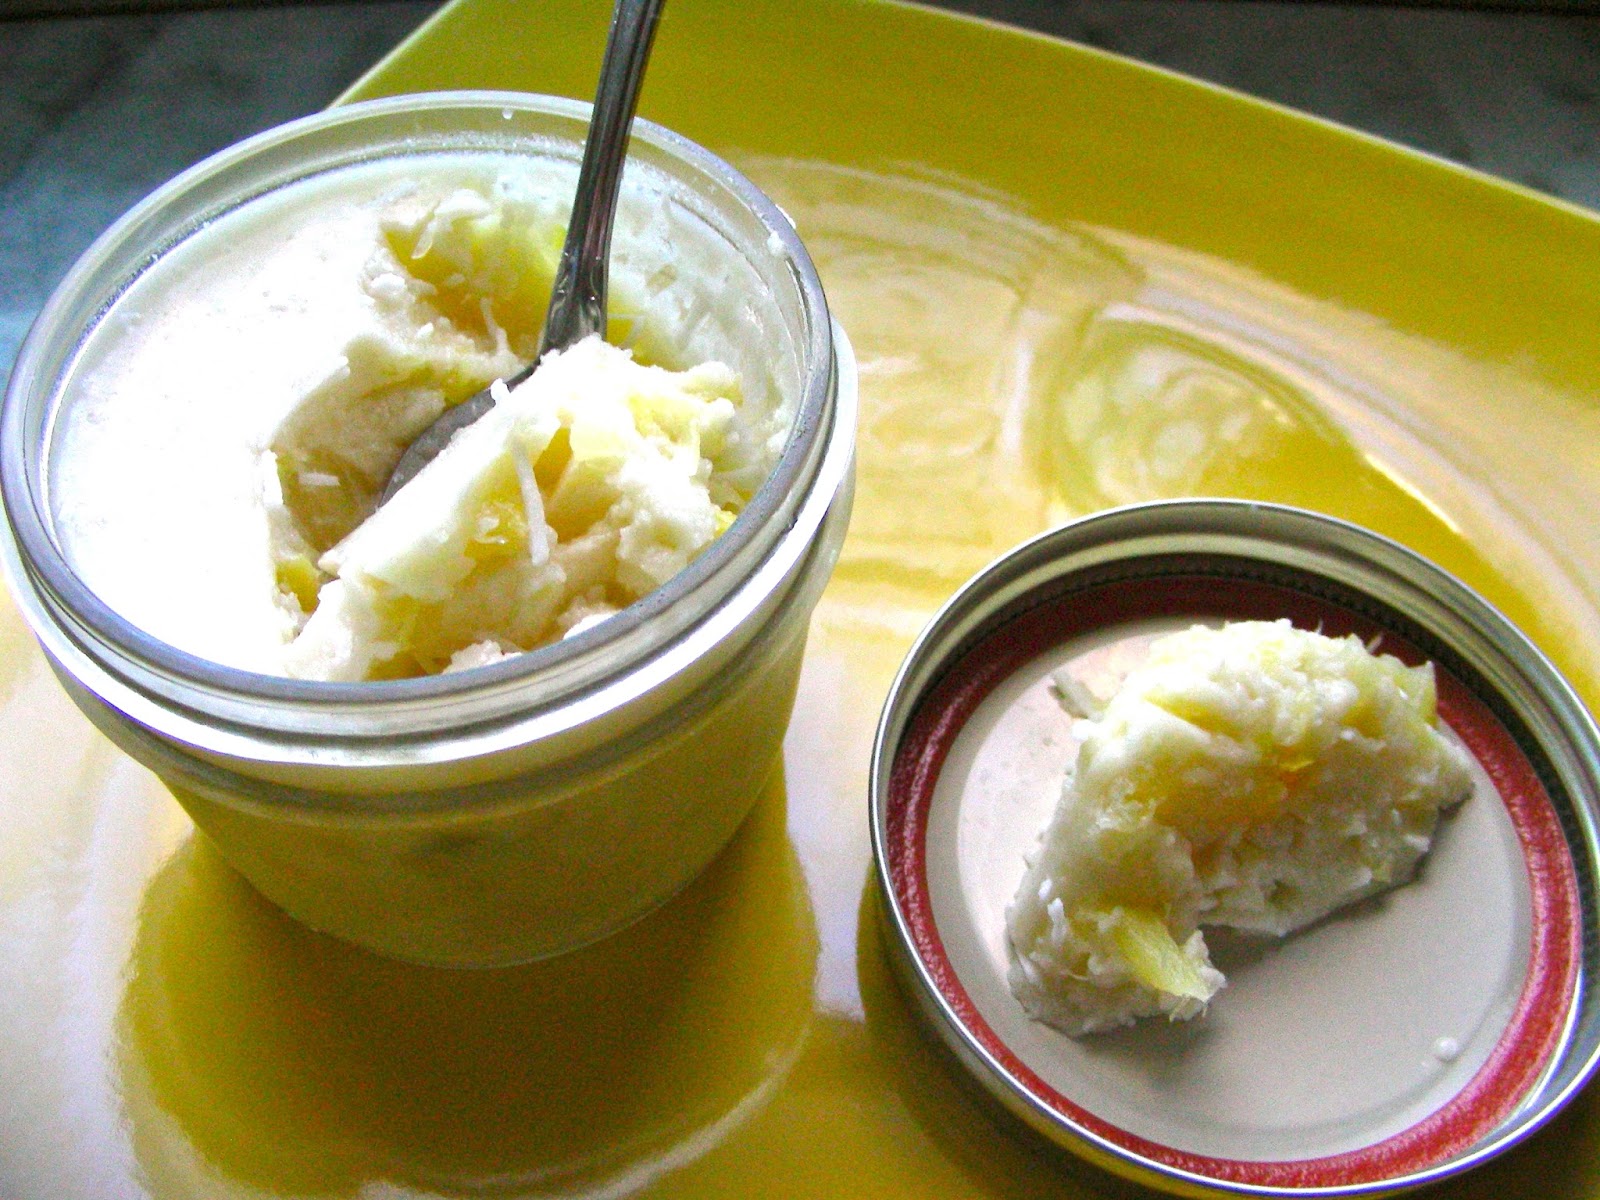
Random Food Fridays - Pina Colada "Gello"
I love this "gello" snack! This new-style "gello" has ingredients that are more readily available than my last "gello" post and it tastes great. I hope you will try it!
Pina Colada "Gello"
1/2 cup orange juice
1 tbsp. lemon juice
1/2 cup water
1 15 oz. can of crushed pineapple, packed in juice
1 13.5 oz. can coconut milk
1 tbsp. gelatin
1/2 tsp. vanilla extract
1/2 cup shredded coconut (I use sweetened, as for baking. No additional sweetener is needed, unless you want it.)
Drain the pineapple well, reserving the juice. Dissolve the gelatin in 1/2 cup cold water until softened. Combine the softened gelatin, orange juice, lemon juice and reserved pineapple juice in a small sauce pan and place over medium heat. Stir and heat just until all the gelatin is dissolved and no lumps remain. Remove from heat and pour into a mixing bowl that holds 6 to 8 cups. Stir in the coconut milk and place in the refrigerator to cool. Allow to cool until it is at the blob stage. Gently fold in the crushed pineapple and coconut. Pour into serving dish(es) and chill until firm. This make about 6 cups.
Friday, April 8, 2016
Random Food Fridays - New Style "Gello"
My family and I went to Disneyland during December and had a wonderful time. It was my first time to attend Disneyland with my daughter as a grown up lady. We took her when she was 4 and then 10 years old. Now, at 29, Miss Madelyn is still a very good time! There was only one bad thing that happened, and it was oh so bad... I got food poisoning! I'm so glad it was on the last day of our three-day park hopper. I'm also very glad no one else got sick! I had a harrowing night at the hotel. We were all worried that I wouldn't be able to endure the long drive home (6 hours) the next day. Fortunately, I did as well as could be expected on the trip home and Mr. Dwayne drove as fast safety would allow.
The result of this was more than a few days of feeling yucky, it really knocked my immune system for a loop. I didn't realize this kind of illness could result in a compromised immune system until I caught every virus I remotely encountered for the next three months! I was sick or getting better from being sick most of the first quarter of 2016. This had to change! So, I started more juicing and launched a diet rich in probiotics and gut healing foods.
Two of the things that have helped me the most are Bio Kult probiotics and grass fed gelatin.
Gelatin is an animal product, so the way the animals are raised makes a difference. You can make your own in the form of homemade bone broth or you can purchase plain grass fed gelatin. Vital Proteins and Great Lakes both offer great choices.
I'm still a beginner at gelling. I'm looking forward to making gummies and to adapting some of my family's traditional jello recipes. Those traditional recipes have a lot of sugar and all those crazy colors. Food coloring truly creeps me out! This "gello" is yummy and full of good stuff, including enough healthy fat and protein to make it a snack with staying power.
New Style "Gello"
1 lb. strawberries
1/4 cup maple syrup
1 tbsp. raw evaporated sugar
1/2 cup room tempurature water
2 tbsp. plain gelatin
1/2 cup Meyer lemon juice or other fruit juice
1/2 cup ginger bug liquid (or more fruit juice)
1 can full fat coconut milk
1 tsp. vanilla extract
Wash and hull the strawberries and place them in a large bowl. Add the maple syrup and sugar and mash with a potato masher until the juices start to release. Set aside.
Dissolve the gelatin in the water and set aside.
Strain the juice from the strawberries and place in a small sauce pan. To the strawberry juice, add the lemon juice and softened gelatin. Over a medium heat, simmer and stir just until the gelatin dissolves completely. Remove from the heat. Add the coconut milk and stir to combine. Stir in the ginger bug liquid and the vanilla. Place the "gello" in the refrigerator to cool. When it become thick but still soft, fold in the strawberries. Place in a serving dish and chill until set. Makes 6 cups.
Sunday, April 3, 2016
Fukushu Kumquat Marmalade
My BFF, Paula, called me from a Santa Cruz farmers market and asked me, "Do you need kumquats? These are the biggest I've ever seen!" Now, need may not be the exact word to describe my relationship with kumquats, but the question resulted in 3 lbs. of these beauties, gifted to me.
We have a lot of citrus in Sacramento. All kinds of citrus trees line our downtown streets as understory trees beneath the great Plane and Sycamore trees. As I take my lunch time walks, I often spy out oranges, grapefruits, lemons, limes, mandarins and kumquats. (I have the eyes of a forager!) In all my yard-food spying, I have never seen kumquats like these. They are much larger than what I usually see and have previously preserved. They are also softer, more pulpy and very fragrant. Based on a google search, I think these are Fukushu Kumquats - a hybrid of kumquats and mandarins. I don't know for sure, but the descriptions and photos make this my best guess.
These seemed too big to preserve in halves, as I did in Kumquats Preserved in Honey and Rosewater. They also seemed too small to separate the zest and segments, as I do for most of my marmalades. What I ended up doing is cutting them into quarters, lengthwise, cutting away the tough center membrane and popping the seeds out with the knife tip.
I then sliced the rind and pulp that remained into thin strips.
As is often the case, I made this marmalade over several days. Not because the recipe requires it, but because I was busy and received them during the week. One night, I quartered and seeded the fruit. Another night, I cut the thin slices and simmered them with water. I then added the sugar and popped the sweetened fruit back int he fridge until I was ready to can. Everything goes in the fridge between each of the steps, of course.
Even though the processing had some delays, the flavor is bright and fresh. I think that having the peels sit around for a while also made them more tender. They still give a nice bit of bite, but do not disrupt the overall texture of the marmalade as you chew.
If you happen to come by these unusual fruits, this marmalade is well worth your effort to try!
Fukushu Kumquat Marmalade
3 lbs. Fukushu or other larger kumquats
4 1/2 cups sugar
Thoroughly wash and dry the kumquats. Slice lengthwise into quarters and cut out the tough center where the membranes meet. Pop out the seeds. Slice the remaining quarters into thin strips. The prepared fruit should measure to about 5 cups. Add 5 cups water and bring to a boil. Reduce heat and simmer gently for about 20 minutes. Remeasure the cooked mixture. It should equal about 7 cups. Add 4 1/2 cups sugar.
When ready to can, prepare water bath canner, 8 half-pint jars, lids and rings. Place some saucers and tea spoons in the freezer.
In a very large sauce pan, bring the combined fruit and sugar to a boil. Once boiling, keep a close eye on it and stir down occasionally. It foamed up quite a bit for me. The foam will subside near the end of the cooking time. When the marmalade begins to thicken and the bubbles are glossy and not foamy, begin to test for set. You can also use a thermometer and start checking when the temperature reaches 220 degrees. To test for set, scoop a bit of the marmalade out with one of the spoons from the freezer. Place it back in the freezer on one of the saucers and let it cool for a couple of minutes. Remove from the freezer and tip the spoon onto the saucer. Does it drop thickly? Does it wrinkle when you push the blob on the saucer? If it does, it is good to go!
Carefully fill the hot, prepared jars and wipe the rims. Top with lids and rings and process in the boiling water bath for 10 minutes. Remove carefully and place them on a tray lined with a tea towel.
Makes 7 to 8 half pint jars.
Friday, December 25, 2015
Christmas Morning Stollen
Good Morning and Merry Christmas!
Come on in for a cuppa and a treat!
It's not a White Christmas, but it's chilly.
We can pick a lemon for your tea or put a dollop of molasses in your coffee.
Stollen has been around for centuries. I'm not adding anything here but proof that you can do it and that you can make it your own with a few tweaks. Many people don't like traditional candied fruits, so I made mine with dried fruits soaked in apricot brandy. Even my picky eaters have been enjoying them.
Christmas Morning Stollen
1/2 cup golden raisins
1/2 cup dark raisins
1/2 cup dried cranberries
Apricot Brandy to cover
Combine the dried fruits and brandy in a glass container. Cover and let soak in the fridge overnight.
1/2 cup warmed milk
1 pkg. dry yeast
pinch of sugar
Lightly warm the milk. Stir in the sugar and yeast. Let this this show proof of its liveliness while you prepare the rest of the ingredients.
4 cups all-purpose flour
1 egg
1/3 cup sugar
zest of 1 lemon
zest of 1 orange
1/4 tsp. salt
1 tsp. vanilla extract
Place all of the above ingredients, and the frothy yeast into a large bowl or the bowl of your stand mixer and combine until all of the ingredients are well mixed. At this point, things will look a little raggedy. Do not fear! Set aside.
14 tbsp. butter, softened
2/3 cup flour
1/4 tsp. ground nutmeg
1/4 tsp. cardamom
In another bowl, cream the butter, an additional 2/3 cup flour and spices until smooth and fluffy. Gradually mix the flour and butter mixture into the raggedy dough until it is all incorporated. I used the dough hook of my mixer for this process. It will come together and be very still but smooth. Allow the dough to rest for about 30 minutes.
1/2 cup sliced almonds
Drain the brandied fruits and keep the lovely liqueur for another use. With lightly floured hands, knead the almonds and drained fruits into the dough. Cover the dough and allow it to rest for another 15 minutes.
Line a baking sheet with parchment paper. Divide the dough into balls about the size of a golf ball. With good planning, you can get 24. As you can see, I got 21. Place them on the lined baking sheet, cover lightly and allow to rise in a warm place until slightly puffy. This stiff dough will not rise dramatically, just a bit. It's cold in my house, so I sat them on a heating pad, set to low and covered them with a tea towel.
Bake in a preheated 350 degree oven for 25 to 30 minutes, or until lightly browned and set. Remove from the oven and allow to cool on the baking pan for 10 minutes.
1/2 cup melted butter
2 to 3 cups powdered sugar
When they are cool enough to handle, dip into the melted butter then roll in powdered sugar. Store in an air tight container. Serve with a hot cuppa and enjoy!
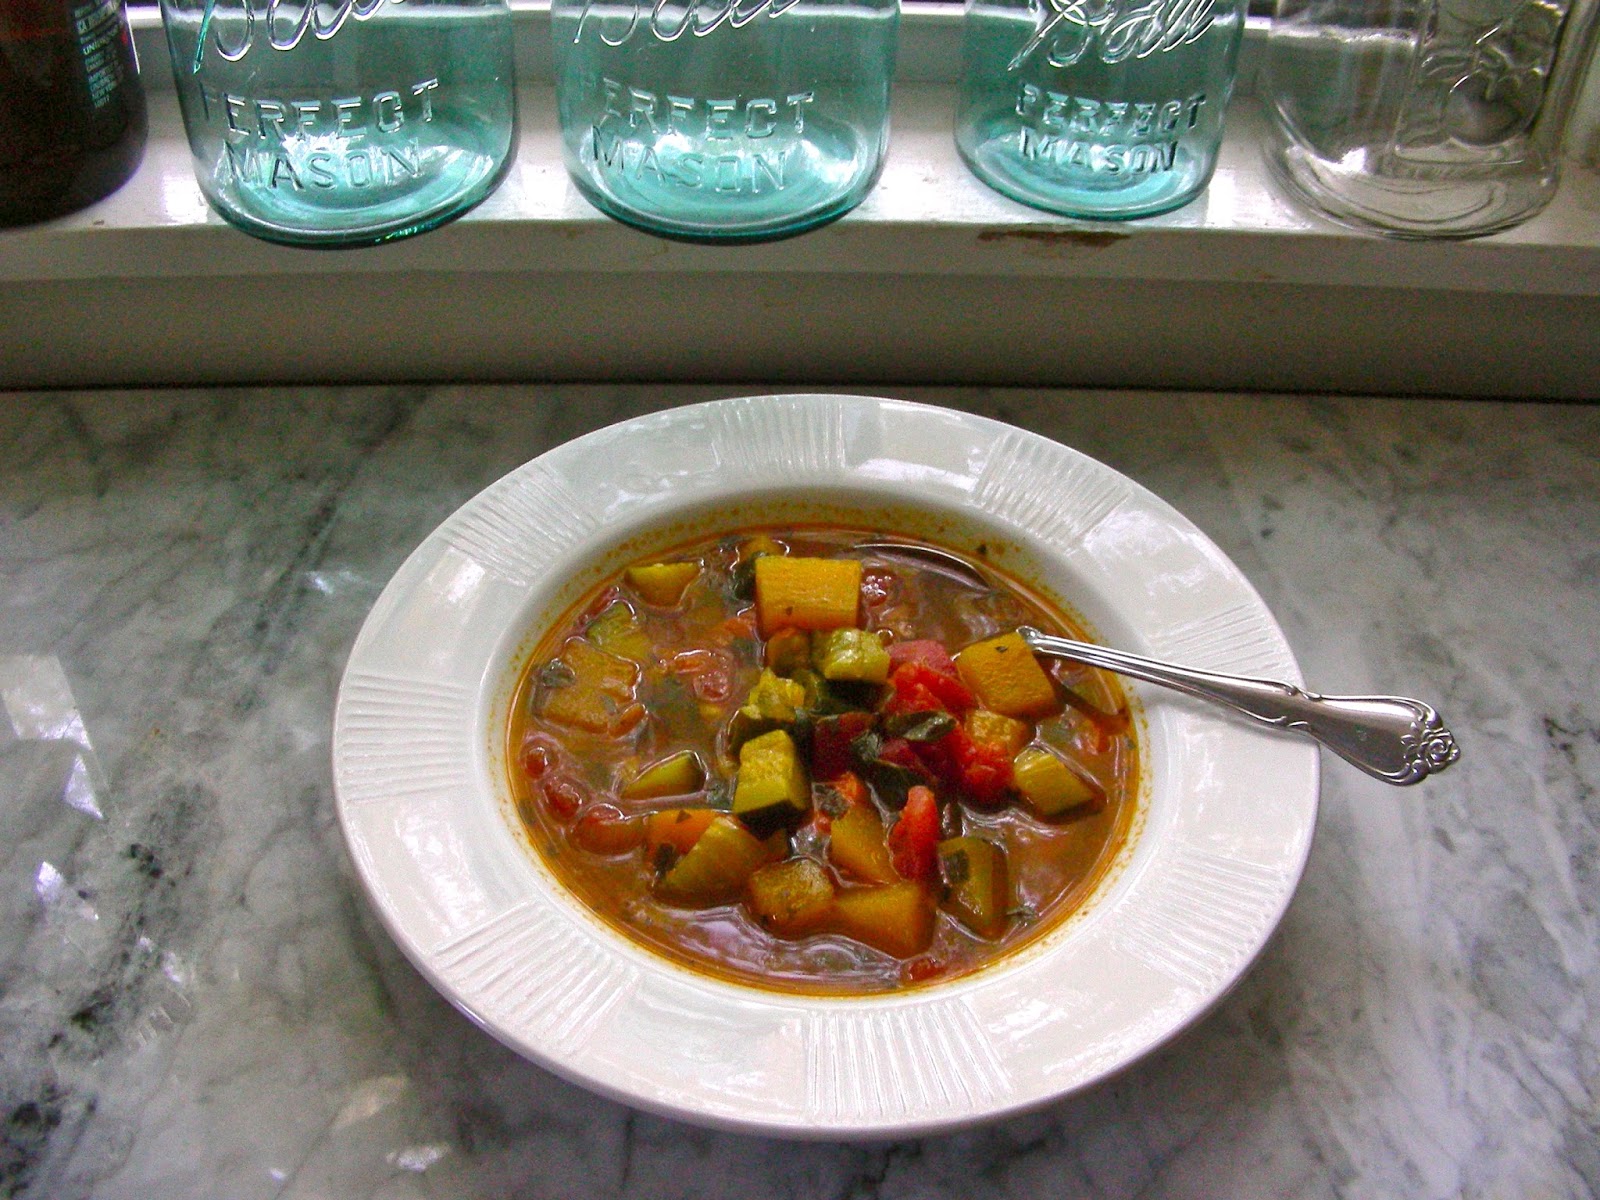
Spiced Fall Soup
As the weather cools, I switch from various salads for lunch to various soups. Soup! You may recall my Love Letter to Soup from the Fall of 2010. Fall seems to call for a rich and spicy sweetness. I know that when I made this soup, I was thinking about how the turmeric and ginger would help me to resist both the cold temperatures and the cold germs going through my office. Soups are a kind of never-fail template for eating well with the seasons.
Spiced Fall Soup
3 tbsp. olive oil
1 cup diced yellow onion
1 cup diced red bell pepper
1/2 cup diced celery
1 cup diced carrot
2 cups cubed zucchini squash
2 cups cubed butternut squash
2 cloves garlic, minced
1/4 cup chopped fresh parsley
1 tbsp. chopped fresh tarragon, or 1 tsp. dried
2 tsp. sweet paprika
2 tsp. turmeric
1 1/2 tsp. ginger
1 tsp. cumin
1/2 tsp. smoked paprika
1/2 tsp. cinnamon
1 tbsp. brown sugar
1 can of diced tomatoes with liquid
1 can garbanzo beans, drained
8 cups chicken stock
Salt and pepper to taste
Heat a large, heavy bottomed, soup pot and add the olive oil. Add the remaining ingredients, except the chicken stock, tomatoes and beans. Saute until the vegetables are wilted and the spices have become fragrant. Add the remaining ingredients. Bring to a boil then reduce to a simmer. Simmer for about 20 minutes, or until everything is tender. Taste and add salt and pepper to your liking.
Friday, October 23, 2015
My Best Ginger Ale
Are you like me? The days rush by. I do my best in each moment. I never quite do everything I'd like. Part of my practice right now is to be ok with that. A lot of things just have to be ok. Other things are so darn sweet! I try to pay attention and remain curious and open. Our world requires a lot of mindfulness and patience! Today, I'm sharing one of those things that makes my life more sweet.
I stopped drinking sodas long ago. With only sickly sweet or wacky chemical taste to choose from, I just gave up and went for iced tea. My daughter tried to turn me on to kombucha, but I never acquired a taste for it. A bit too earthy for my tastes. But I really missed the bubbly. I like sparkles in my mouth! I'm so grateful I ran into Wellness Mama and her ginger bug. I already posted about my experiments with root beer, but my favorite has become this ginger ale with a touch of vanilla. I've developed a rhythm that keeps me in soda for a week or two and keeps my bug healthy.
Fermentation is naturally a slowish process that takes planning. Really, what it takes is some small forethought and good timing. My bug has become more vigorous and flavorful over the summer and this recent batch took only a few days. I keep the bug in the fridge until I am ready to make a new batch of soda. Then I take it out and feed it with about a tablespoon each grated ginger and sugar and let it warm up for about 24 hours. Then, I make the flavorful tea, add the bug and let it all stand in the two big pickle jars you see above. The bubbles you see are just a two-day ferment.
After the first ferment, I strain both jars into a big pot. This insures that the flavors are all blended. I then bottle it up. This batch was fizzy after just one night's sleep on the counter. I check the bottles over the sink and listen for the little "ffssst" that escapes. That's the time to store the bottles in the fridge until they are ready to drink. If you have bottles that are over a week old, I would strongly suggest you open them over the sink. And, for goodness sakes, don't forget them on the counter!
Look at those lovely, tiny bubbles. So refreshing!
Every time I drink this, I feel like I'm doing something good for myself. This is what the old-time advise to drink ginger ale is all about. I find this really helps when I have an IBS flareup. It feels so good and soothing.
I know I'm not telling anyone anything new today. I'm really just repeating something that is worth repeating, with my own preferences for your consideration. If you can feed a pet and make a pot of tea, you have the skills you need to make the best soda you have ever tasted.
My Best Ginger Ale
6 cups non-chlorinated water
2 inches of fresh ginger, grated or chopped
1 cup organic whole sugar crystals
1 inch of vanilla bean, split
1/2 tsp. pink salt
Additional 10 cups non-chlorinated water
1/4 to 1/2 cup lemon juice
1 cup lively ginger bug
Place 6 cups of water in a large pan. Add the ginger, vanilla bean, sugar and salt. Bring to a boil, reduce heat and simmer for a few minutes. Remove from heat and let the tea mixture stand until luke warm.
When the tea mixture is luke warm, add the remaining 10 cups of water, lemon juice and ginger bug. Taste for acidity. I tend to use more lemon juice with fresh lemons, especially Meyer Lemons. If I'm stuck using bottled lemon juice, I use less. Place everything in one great big or a few just big jars that have tight closing lids. Try to evenly distribute the solids. Close the lids and let stand at room temperature until it starts to bubble.
To bottle, strain the mixture into a large container and stir to fully blend flavors. Carefully pour into lever cap bottles, leaving up to 2 inches of head space. Seal and let stand at room temperature over night or for a day or two. Check daily. The warmer your kitchen, the faster the ferment will be complete. Once the bottles and nice and bubbly, keep them chilled until use. This makes just about a gallon.
By the way...I'm drinking this RIGHT NOW!
Thursday, July 16, 2015
Random Food Fridays - Green Lentil and Sardine Salad
Well, it's been a while, and here I am with another salad. But, I do have fresh garden tomatoes for the salad! My garden is pretty small. I've never really had enough of anything from it to can a batch of sauce, jam or relish. Canning these tomatoes would seem kind of a shame, too. They are so pretty and delicious. Such a treat!
Here is the tomato corner of my little garden. They've done pretty good this year, considering this whole corner was a giant mud hole over the winter when we had to have our sewer line and water main replaced. Have no fear! No sewage was used in the growing of these fine tomatoes!
The two varieties shown on my plate are Old Yellow Candy Stripe and Tess's Land Race Currant. I ordered the seeds from Baker Creek Heirloom Seeds. Many heirlooms have to be started from seed. It's not as hard as I thought it would be. In Sacramento, we have mild winters and I can start my seeds outdoors as early as January, as long as I protect them in these little greenhouses. I use empty one-gallon milk or water containers, cut around the middle, leaving enough for a hinge. When the weather warms up and the seedlings get too tall, you just clip the hinge and let them toughen up a bit. I find this old school aluminum table also helps by being very reflective.
The Old Yellow Candy Strip is a determinate tomato, which means they all ripen at once and that's the end of your harvest. Right now, I have about a dozen very large juicy tomatoes awaiting my pleasure. (This guy even had a smile for me!) The current tomatoes, like many small tomatoes, will keep producing for a while. That kind is called indeterminate. Tess's Land Race Currant are an amazing experience. It's as if each one had all the flavor of a large tomato compacted into one juicy burst! They are perfect for adding to any kind of salad. I like to leave them whole, so I can get the yummy POP.
This salad is what people mean when they are talking about a healthy Mediterranean diet - lentils, omega-3 rich cold water fish, veggies and good extra virgin olive oil. I think people can be a little scared of sardines. People, they are so good! And good for you! And sustainable! And low on the food chain! (Meaning fewer heavy metals and toxins.) I get mine at my friendly neighborhood Costco - Wild Planet Wild Pacific Sardines packed in Extra Virgin Olive Oil. If you can't commit to a 6 pack, Trader Joe's has some you can purchase one can at a time.
Green Lentil and Sardine Salad
Salad:
1 cup dry whole green lentils
1 cup diced carrot
1 cup diced celery
1 shallot, diced
1/4 cup Kalamata olives, sliced
1 tbsp. capers
zest of 1 lemon
2 cans of sardines in extra virgin olive oil (4.375 oz)
1 cup cherry tomatoes
Note: I was completely out of parsley, but that would make a very nice addition!
Dressing:
Juice of 1 lemon
1/4 cup white wine vinegar
1/2 cup extra virgin olive oil
1 tsp. coarsely ground black pepper
1/2 tsp. salt
1 large clove garlic, mashed
2 tsp. country style Dijon mustard
1/2 tsp. sugar
For the salad, place a medium sauce pan with 6 cups water over high heat and bring to a boil. Once boiling, add the lentils and stir to prevent clumping. Return to simmer and continue to simmer until they are soft but still hold their shape - about 20 minutes. (Nothing beats the bite test for this.) Drain and rinse with cold water to cool. Add all other salad ingredients and toss.
For the dressing add all ingredient to a jar with a tightly fitting lid and shake. When the dressing is emulsified, toss it with the salad. I found that this salad took all of this dressing. The flavor will improve with a few hours of marination.
This makes 4 to 6 lunch time servings for me. It will serve more as a side dish.
Subscribe to:
Posts (Atom)