Friday, August 31, 2012

Random Food Fridays - Sweet Potato and Adzuki Bean Salad


Here's another crazy salad for your consideration. I often visit the farmers' market on Sunday mornings and then spend much of the afternoon preparing food for the week. My go-to lunches are salads in Summer and soups in the cooler months. With soups and salads there are no limits. You've seen plenty of salads if you check this little blog on Fridays. This salad came on a Sunday when I didn't make it to the market. I foraged in my fridge and pantry for likely pairings and boom! Salad!


Adzuki beans are little dark red beans that are slightly sweet. They are often used in Japanese desserts. I've had sweet bean paste in mochi and whole sweet beans in shave ice and in chilled fruit salad. You might think sweet beans are weird, but think about baked beans - they are sweet and delicious. I also chose to use adzuki beans because they are small and don't take as long to cook as larger beans.


I started with 1 cup of dried beans and ended up with about two cups cooked. Not all the beans got used in this recipe. I used about 1 1/2 cups, similar to what you would find in a can of beans. You can use any kind of bean you like.

Sweet Potato and Adzuki Bean Salad
1 medium sweet potato (about 1 lb)
1 large, ripe tomato, cored and diced
1 small red pepper, cored and diced
1 carrot, diced
1 shallot, peeled and diced
2 ears sweet corn (I had leftovers from the grill), cut from the ears
1 big hand full chopped parsley
1 1/2 cup cooked and drained adzuki beans
white wine vinaigrette*
hot sauce, if desired (I like Tapatio!)

To cook the sweet potato, peel and dice into about 1/2 inch chunks. Bring a pot of water to a boil and add the sweet potatoes. Cook until just fork-tender. Do not over cook. Drain and rinse with cool water.

Toss all the veggies and beans together and add vinaigrette to taste. Add hot sauce, if desired.

Makes 4 lunches for me.

*White Wine Vinaigrette
1/2 cup white wine vinegar
1 cup extra virgin olive oil
1 tsp. country style Dijon mustard
1/2 tsp. salt
1/2 tsp. cracked black pepper
1 clove garlic
1/4 tsp. sugar
1/4 tsp. garlic and herb seasoning

Add all ingredients to a jar with a tight fitting lid and shake like crazy.


Friday, August 17, 2012

Random Food Fridays - Gluten Free Peach Crisp


My dear friend, Miss Paula, is off the gluten. She says she feels much better for it, with several pounds released and a sharp decline in her acid reflux. Me, I say, "Pass the bread, and don't forget the butter!"

So often, when I bake a treat, Miss Paula cannot enjoy it with us. Every once in a while I try to whip up something we all can enjoy. This is one of those recipes and it came out great. If you don't want or need your finished product to be gluten free, you can use regular AP flour in place of Pamela's pancake mix.

By the way, Pamela's mix make fantastic pancakes!

Gluten Free Peach Crisp

8 cups fresh peaches that have been peeled, pitted and sliced
1 tbsp. lemon juice
2 tbsp. cornstarch
1/2 tsp. cinnamon
1/2 cup sugar

2 cups old fashioned rolled oats
1/2 cup Pamela's Baking and Pancake Mix
1/4 tsp. salt
1/4 tsp. cinnamon
1/2 cup sugar
1/2 cup packed brown sugar
1/2 cup cold butter
1 cup dry toasted sliced almonds (I like Trader Joe's)

Preheat the oven to 400 degrees.

Place the peach slices and lemon juice in a large bowl and stir. In a smaller bowl, combing the cornstarch, cinnamon and sugar, then stir this mixture into the peaches. (Mixing the cornstarch in with the sugar helps to prevent it making clumps when you stir it into the fruit.)

Butter a 9 X 13 inch bake pan. Spread the prepared peach mixture into the pan.

In another bowl, combine the oats, Pamela's mix, salt, cinnamon and sugars and give it a stir. Cut the cold butter into little chunks and add to the oat mixture. Combine the mixture by squishing it together with your fingertips. When it is well combined, stir in the sliced almonds.

Spread the oat mixture over the peaches and bake in the preheated oven for about 45 minutes.

Serve warm with vanilla ice cream. Yum!

Wednesday, August 15, 2012

Wild Grape Jelly


Food is everywhere. Really! At least, where I live, in the great valley of Sacramento. This is farm country. If you ever fly into Sacramento, you will see a green and gold patchwork all around, with glints of light flashing up from the rivers and rice paddies. It's magic. I think we sometimes take it for granted.

Some foraging outings are easier than others. Leaves may be tricky for a beginner to identify and prepare well. But, fruit is often easy to smell, see, gather and eat. The plant's effort to grow and increase  results in generous gifts for those of us who gather and eat. I've foraged figs, blackberries, wild plums, feral pears, and elderberries. None of them are much effort, except maybe the blackberries. I spotted these grapes growing up and over elderberry bushes and bitter almond trees near my house on a levy. Usually, I'm cautious about foraging close to a road. There may be spraying. My philosophy is this - the more abandoned and unkempt the area looks, the less likely it is to be managed by chemicals. My only competition for the fruit I gathered in this spot was a raccoon. We had a bit of a staring match, then Mr./Mrs. Raccoon decided to retreat and come back again later. Very gracious and appreciated.

As I travel through this beautiful world, I find myself scanning the roadsides, open fields and public spaces. Sometimes I find treasure, like the loaded peach tree I found in an abandoned parking lot last night. Sometimes I wonder why there isn't more food growing everywhere. Why not have parking lot trees that provide shade and fruit? Granted, there may be some splats in the harvesting season. I wouldn't mind. Even a "vacant" lot in an urban neighborhood, can have tons of edible plants. Fruit is more rare than those leafy pioneer plants that populate fields, but it is out there and in abundance.


Wild grapes will range from a transparent green to deep purple as they ripen. They are smaller than table grapes and have large seeds. They taste nice, but are tricky to eat because of the seeds. If you find a ton, you could make grape juice for canning. Grapes have plenty of pectin and if you are patient, you will be rewarded with a beautiful color and wiggly set. I never really liked grape jam or jelly as a child. Those flavors just tasted like sugar to me. This tastes like concentrated grapes. You get a bit of the tannins and a rich and unexpected depth of flavor. The gathering of these grapes was well worth the effort. Like many wild foods, you have to hit it when the time is right. I gathered and made this jelly last week and the remaining grapes in my neighborhood are already drying out. Some may continue to be available at higher and cooler elevations over the summer and fall.

Wild Grape Jelly
Ripe wild grapes
Sugar
Lemon Juice

Step 1 - Make the Juice
Remove the grapes from the stems. Wash and sort them, removing grapes that are spoiled and any debris. Place the grapes in a large pot with enough water to cover the bottom by 1/2 inch. Bring to a boil, reduce heat. Simmer until the grapes are soft. You can help them release their juice by mashing and stirring with a potato masher as they cook. Once the grapes are pulpy and the seems easily separate from the rest of the fruit, remove them from the heat. Line a colander with several layers of cheese cloth and place the colander over a tall pot. Gently pour in the cooked grapes. Allow the fruit to drain, undisturbed, 8 hours or overnight. Do not squeeze the fruit in the cloth. Let the juice stand for several hours to allow the tannins to settle to the bottom of the pan. Carefully pour the juice off and leave as much of the sediment behind as possible. Now your juice is ready to make into jelly.

Step 2 - Make the Jelly
Prepare the boiling water bath and several jars, lids and rings. Place some saucers and teaspoons in the freezer. Measure the grape juice. Your batch can be somewhere between 4 and 6 cups. Don't use more than 6 cups of juice. Add 3/4 cup sugar for each cup of juice. Stir to dissolve. Taste and add lemon juice to balance the sweetness. (My grapes were quite sweet and I added a couple of tablespoons of lemon juice just to balance the flavor. The lemon juice is not needed for a safe acidity with most wild grapes.) Bring the juice and sugar to a boil. Reduce heat slightly and continue to boil until the juice reaches about 220 degrees. Jelly does not visibly thicken like jam does. You can use the thermometer to let you know when to start the saucer testing. Once the temperature is reached, use one of the frozen spoons to scoop out a small amount of the jelly. Place the spoon back in the freezer for a few minutes. Observe how the jelly pours off the spoon onto the saucer. When it sheets or bloops off, push what has fallen to the saucer with your finger. If it wrinkles and mounds up, it is ready.

Remove the jelly from the heat and skim any foam. Carefully ladle the jelly into the hot, prepared jars. Leave a quarter inch head space. Wipe the rims and cover with the prepared lids and rings. Process in the boiling water bath for 10 minutes. Use your jar lifter to remove the jars from the boiling water bath, being careful to keep the jars level, and place them on a towel lined tray. Do not disturb the jars until after the seal has formed. The jelly's set will become more firm over the next few days.

I gathered two 9 X 13 baking pans full of grapes before I started this process. The grapes I gathered made 6 half-pint jars.

Saturday, August 11, 2012

You Say You Want to Make Some Pectin


I periodically share a recipe with your that includes some of my homemade apple pectin. There is really nothing wrong with commercial pectin. It's made from fruit, but it's very processed. Commercial pectin reduces cooking time, which can be desirable. But a short cooking time isn't the best if you don't want your fruit to float, or if you want to infuse an extra flavor, such as from vanilla beans or cinnamon sticks. Silly me, I like the challenge too. I think I'm getting to know the fruit better when I work with its own pectin. If I discover that it just won't set up on its own, I can add some of this apple pectin for the second try.

I didn't even know you could make your own concentrated pectin until I saw this post from Tigress in a Jam. It's really easy. She cans hers, but I like to keep them in the freezer.

My father-in-law has a McIntosh tree. He  LOVES his Macs! The last couple of years, I've gathered the apples that fall to the ground when they are still green to make pectin. You can make pectin from any unripe apple, or you can use granny smith apples. They are loaded with pectin. You can also make pectin from quince, but they are so fragrant and their reduced juice so red, that they will not hide in your jam like this apple pectin will.

This is one of those recipes where you can use any amount you happen to have on hand. I package it in 2/3 cups portions in freezer bags. This seems like the right amount from most batches of jam. My experimental jams tend to work with 6 to 8 cups of prepared fruit. Sometimes I break them in half for medium-pectin fruits or mixtures that include a high-pectin fruit.

Apple Pectin
Apples - unripe or granny smith
Water to cover the bottom of your pan by 1 inch

Wash the apples. If they have any bruises or wormy spots, trim them away. Chop the apples into 1 inch pieces. Use the peel, cores and seeds. These have a lot of the pectin. Add the apples to a large pan and add enough water to cover the bottom of the pan by 1 inch. Bring to a boil, reduce the heat and simmer until the apples are very tender. Remove from heat and allow to cool slightly. Process the cooked apples through a food mill to remove and discard the skins, cores and seeds. Place a large colander, lined with 3 or 4 layers of cheese cloth, over a large pot. Pour the apple puree and allow it to drain for several hours or overnight. Remove and discard the pulp and cheese cloth.


Bring the remaining juice to a boil. Reduce to a low boil and simmer until it is reduced by half. It will turn slightly pink as it reduces. Allow to cool and measure 2/3 cup portions into marked freezer bags.


Add to low-pectin fruits when making jam. Unlike commercial pectin, this is added at the beginning. Use the frozen spoon and saucer method to test for doneness.

Now, when I share a recipe that includes this good stuff, you will know how to make it for yourself!

Friday, August 10, 2012

Random Food Fridays - Quesadillas


I've been using my Weber Kettle a bunch this summer. I think I'm really getting the hang of this indirect heat thing. One of our grilled meals this week was a pork tenderloin roast. I seasoned it very simply, with salt, pepper and garlic/herb seasoning. I put over direct heat for about 5 minutes on each side, then placed it over indirect heat to finish. I roasted sweet corn in their husks too. Both the corn and the pork took about 30 minutes. I did a bunch of veggies on skewers and added them at the 15 minute mark. I brushed the veggies with olive and seasoned them in the same way as the meat. Simple

When I go to the trouble to get that big old kettle going, I like to fill it up! When our food is done and there are still coals left, I'm often tempted to go door-to-door and say, "Hey, I've got hot coals. You wanna cook anything?" Filling up the Weber Kettle for two people usually means yummy leftovers for the rest of the week.

One of the scrumptious leftover treats I had was this quesadilla. It is simple and delicious. Sliced pork, sweet corn, avocado, cheese and a few shots of Tapatio hot sauce. Delish!

That little side salad is just sliced tomatoes, avocado, a dollop of Greek yogurt and a few grates of cheese.

Quesadillas are one of those foundational foods that you can make your own. Like soup, salads and sandwiches, the variations are limitless. The thing that made this one so yummy was the crunchy sweet corn combined with the hot sauce. Yum!


Saturday, August 4, 2012

Getting Started - Equipment, Safety and Delicious Jam


I've been meaning to do this for a long time. Most of the time, my kitchen adventures are fairly solitary. I love being creative in my hot little kitchen. It's a bit of a dance that can be harder with a partner, unless you've practiced. Also, taking good photos is a lot harder than making good jam. Especially while you are busy making jam. My dear friend, Katy, volunteered to come over and take photos of me at work. I'm a visual person and wanted to show you what I mean when I give instructions like, prepare the jars.

You can always go to the official source for canning safety - the USDA. Their instructions are factually accurate, and they do important work, but I can't help but feel that they scare the bejeezers out of people. Botulism is no joke! (More on that later.) But avoiding it is easy.

So, here we go! I will try to break it down into clear and easy steps. As you will see, I'm just a regular gal in a regular kitchen using mostly regular stuff. If I can do it, you can too!


1. Preparing the jars - You must use jars that are meant for home canning. Do not try to use old jam jars from the store. They are not designed for reuse. As long as your jars remain free of cracks and chips, they can be reused indefinitely. If you are reusing jars, run your finger along the rim to feel for chips or cracks. Small chips render the jars unfit for canning, but they can still be used for dry storage or to take your tea to work. I try to keep my current canning jars separate from retired canning jars.

I carefully wash the jars in very hot water, rinse and drain and then place on a baking sheet. If you have a dishwasher, using it is a great way to get your jars super clean. I place the jars in the oven at 250 degrees for 20 minutes. This takes care of sterilization. I then hold the jars at 220 degrees. You can sterilize your jars in the same boiling water that you will later use to process your jam, but I have found that process full of scalds and issues. Holding the jars hot and sterile in the oven allows me to prepare many jars at once and then use them as the batches are ready.


2. Prepare the lids - The ring part of the lids may be reused, but the flat part with the seal cannot. Be sure to retire any rusty or bent rings to the dry goods cupboard.


Rinse both parts in hot soapy water and rinse clean. I like to place the lids inside the rings rather than keeping them separate.


Place the clean lids and rings into a sauce pan with warm water to cover. Set the pan on the stove and set it on the lowest setting. Some recipes will tell you to boil the lids, but this damages the sealing compound. It only needs to be warmed enough to soften.


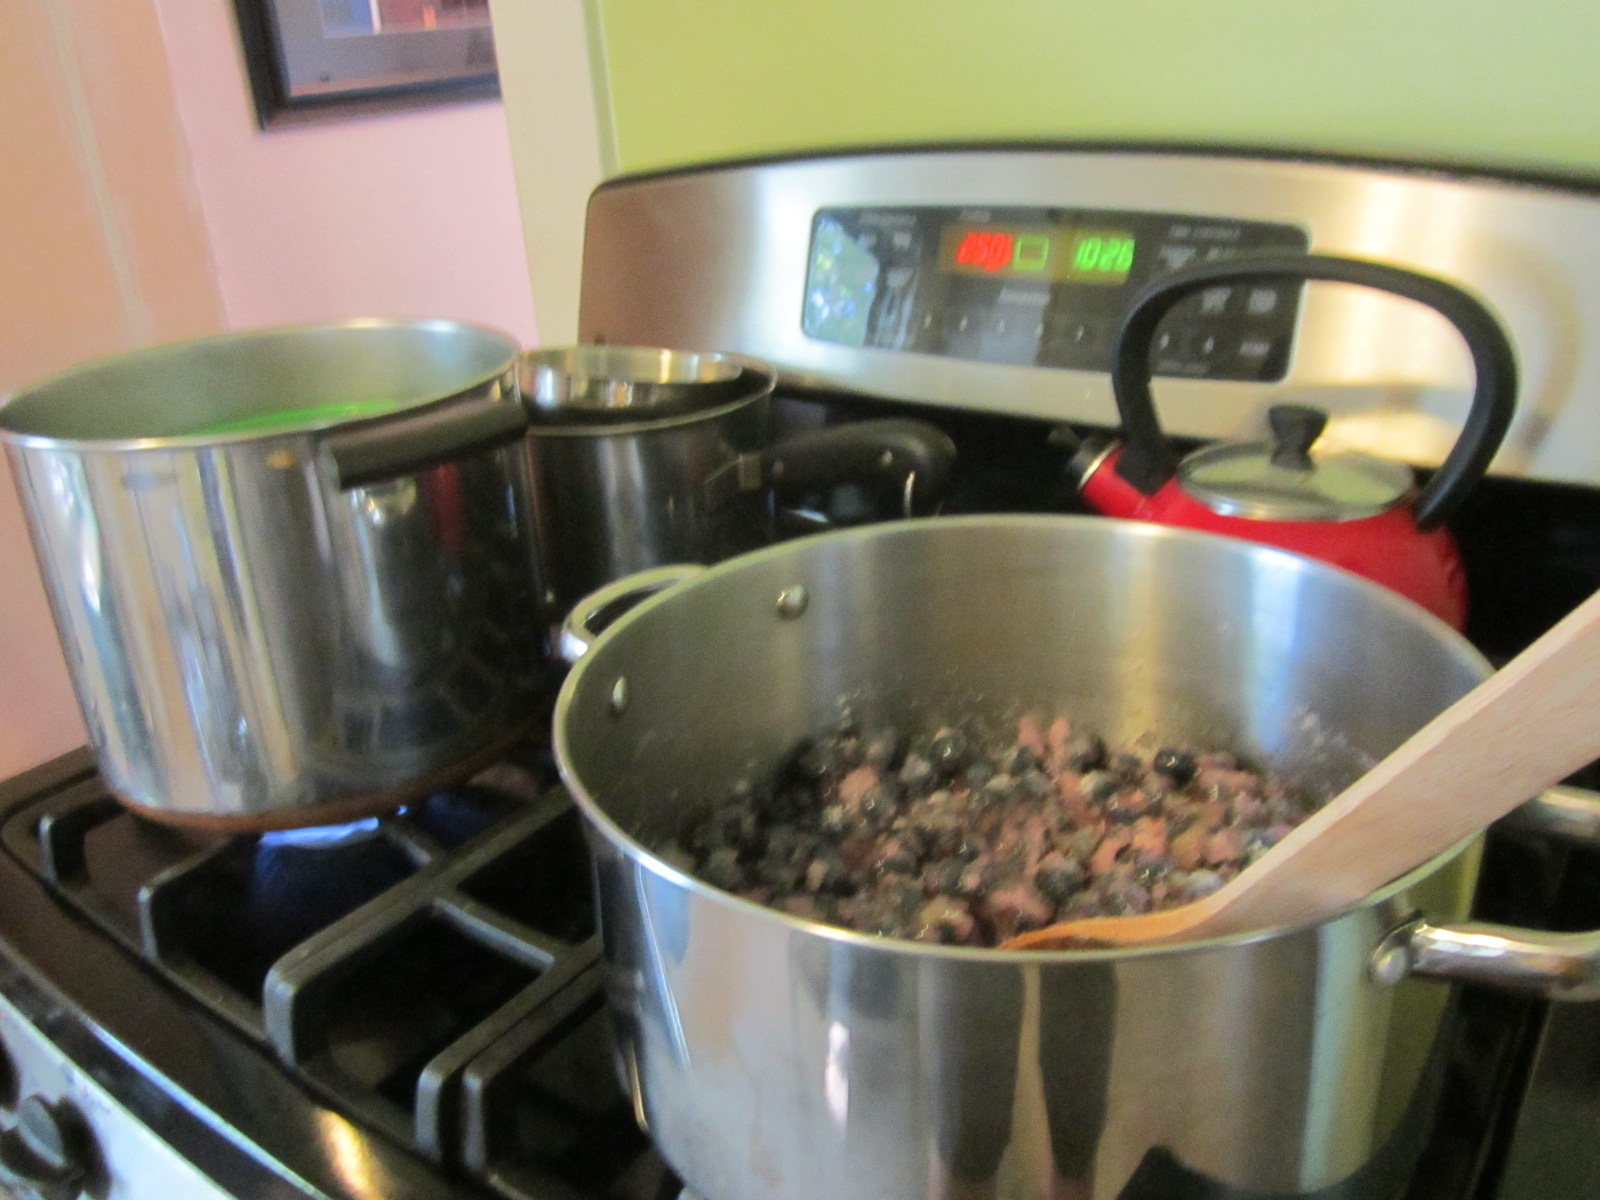
3. Prepare the boiling water bath - A large soup or stock pot works well for the boiling water bath. There is no need to purchase a special canner. What you need is a liner that will prevent the jars from touching the bottom of the pan. I like this silicone basket from the Ball Canning Discovery Kit. You can also find wire baskets that you can insert into your own pot from Norpro. They were at my local restaurant supply for less than $10 each and come in two sizes. Many other retailers offer canning racks that will work just as well as a traditional canner. When I'm working on very large batches, I break out my tamale steamer. Remember that your jars will displace water, so only fill to within about 2 inches from the top. I usually start a tea kettle about this same time. That way, if I need to add some water to cover the jars, it will be nice and hot.


Place the boiling water bath on the stove and bring to a boil. Once it has come to a boil, reduce heat to a  brisk simmer while you complete the jam.

4. Prepare the fruit - I chose blueberries for this example because they are the easiest jamming fruit in the world. If you are using other fruits, some may be prepared a day or two in advance and mixed with the sugar to macerate in the fridge until you are ready to process the jam. I often do complex jams over several week nights.


For blueberries, all you have to do is pick them over. 
Look for stems or any spoilage. Remove the stems and spoiled berries.


Place the rest in a colander and rinse them in cold water.


This recipe uses 2 pounds of blueberries. Costco sells 2 pound boxes of organic blueberries. This could make your measuring very easy. I like to use a kitchen scale. This digital scale is designed so that you can place your bowl on the scale and set the scale to zero. This is called the tare weight, which means you can measure the food weight without the weight of the bowl.


2 pounds, 0 ounces


Pour the berries into a bake pan and crush with a potato masher. Don't over do it. You want to release some of the juice and pulp, but still have some whole berries for texture. Do not use a food processor or immersion blender or you will lose all the character of your fruit.


Scrape the crushed berries into a very large, non-reactive, pot. I have a great 8 quart stainless steel pot that I picked up from a sale table at Macy's for $20! The qualities you want in your jamming pot are a heavy bottom to help prevent scorching, solid riveted handles that are either hollow or made of a material that will stay cool and a wide opening. A big part of cooking jam is the removal of water through steam. The wider your pot, the quicker this will happen.


Add 1/4 lemon juice. Lemon juice is important for a few reasons. Lemon juice will brighten and balance the flavor of sweet fruits like blueberries. Also, acid is essential for the safety of your finished product. Hi acid recipes may be processed in a boiling water bath. Low acid foods are better frozen. If you wish to can low acid items, you will have to learn to use a pressure canner. 


What does acidity have to do with safety? It has to do with botulism. Sugar is a preservative, but doesn't do the whole job. The sterilization of the jars, lids and rings and the processing of the jam in the boiling water bath will take care of any molds and most bacteria. Botulism exists in two forms. One is active and one is a spore that is inactive. The spores are not toxic. Active botulism excretes a neurotoxin that paralyses nerves. The boiling water bath kills any active botulism but it does not reach a high enough temperature to kill the spores. The spores can grow and do their toxic thing in anaerobic environments that are not acidic enough. All canned goods that are processed in a boiling water bath must be at least 4.0 when measured for acidity. I purchased some litmus strips at my local brewing supply store. The lower the number, the more acidic the product is. Luckily, most fruit is considered acidic. Tomatoes are borderline. Veggies and meats are low acid and must be processed in a pressure cooker to insure that the temperature rises high enough to kill the botulism spores. It is really not necessary for you to use litmus strips if you follow a reliable recipe. I do some experimentation, so I bought them to make sure all of my products would be safe. A good rule of thumb is that you must substitute only items of equal or greater acidity. The Ball Blue Book is a great source to help you find out the properties of specific fruits.


Measure the sugar. This recipe calls for 3 1/2 cups. I prefer measuring cups that are designed for dry goods when measuring sugar. If you want to can much, you will want some good tools for dry and wet measuring. Measuring cups measure by volume, so you may also want a scale to measure by weight. (BTW - my Grandma's ancient Tupperware for a whole ham holds 10 pounds of sugar very nicely.)


Mix everything together in the pot.


Stir for a bit to release the juices.


5. Cook the fruit - Place on the stove. Bring to a boil, stirring frequently. (I often do some clean up during this part.) Because blueberries are not very juicy, start with a medium-high heat and keep an eye on it. After it begins to boil, more juice is released and there is less danger of scorching until the end.  This jam does not use commercial pectin. If you use a commercial pectin, you have to follow their rules. They often ask for a hard boil. For these blueberries, I prefer a brisk boil. Once your fruit is boiling, do not leave the kitchen. Many fruits foam up a lot and you will need to make sure that nothing boils over.


When you start cooking the fruit, place a few saucers and tea spoons in the freezer. I use them to test for set.


As the cooking progresses, the foam will subside and the surface will become glossy. You can use a thermometer to measure the temperature. The official gel set temp is 220 degrees. I have found that using a thermometer to test for set is unreliable. For a jam to set, there must be pectin. The more pectin a fruit contains, the lower the temperature required for set will be.

What is pectin anyway? Pectin is a water soluble fiber that is found in the cell walls of plants. Commercial pectin is usually made from citrus fruits. I make my own homemade liquid pectin from green apples. (A post for another day.) High pectin fruits include apples, citrus rinds, quince, cranberries, blueberries, raspberries, blackberries and grapes. A lot of pectin is provided by skins and seeds. Low pectin fruits include apricots, cherries, peaches, pears and strawberries. Again, the Ball Blue Book is a great resource. I also like the Blue Chair Jam Cookbook.


After about 30 minutes, the jam will begin to thicken. See how the surface is glossy and there is no foam? Different fruits will differ a great deal in cooking time depending on how much pectin is available. This is when I start the testing.


To test the set, use one of the spoons from the freezer and scoop out some jam. Place the spoon back on the saucer in the freezer. Check it in about two minutes. It should be just cool. Tip the spoon. Does the jam run right off? Does it hold together and come off in a sheet? Use your finger to push the jam that is now on the saucer. The jam above is nearly ready, but not yet. My finger left a trench, but the jam didn't wrinkle or mound up.


Here is the test that showed me it was ready. I used my finger to push the jam that was on the spoon. See how it mounded up around my finger. Also, as I pushed it, wrinkles formed as the mound was built.


6. Filling the bottles - I usually set up a canning station that includes a clean towel spread on the table and has everything else in place. When the jam is ready, remove it from the heat and set it on some hot pads.


 Allow the jam to cool for a few minutes, stirring gently. This helps the fruit to be more evenly distributed throughout the jam. This is also the time to remove every bit of remaining foam. For this batch, I didn't have any. You remove the foam by skimming the top of the jam with a flat metal spoon. I like to save the foam for a snack!


Pull a hot jar out of the oven.


Place the funnel in the jar.


Carefully ladle the hot jam into the hot jar.


If your fruit is chunky, use a wooden chop stick or bamboo skewer to poke the jam. This will release any trapped air bubbles. Creating a good vacuum seal on the lids requires that the air be able to escape, so you don't want air trapped in the product.


Measure the head space. Head space is the space between the jam and the lid. For jams and jellies, use 1/4 inch head space. 


Use a clean, damp cloth to wipe the rim. Any jam on the rim may prevent a seal.


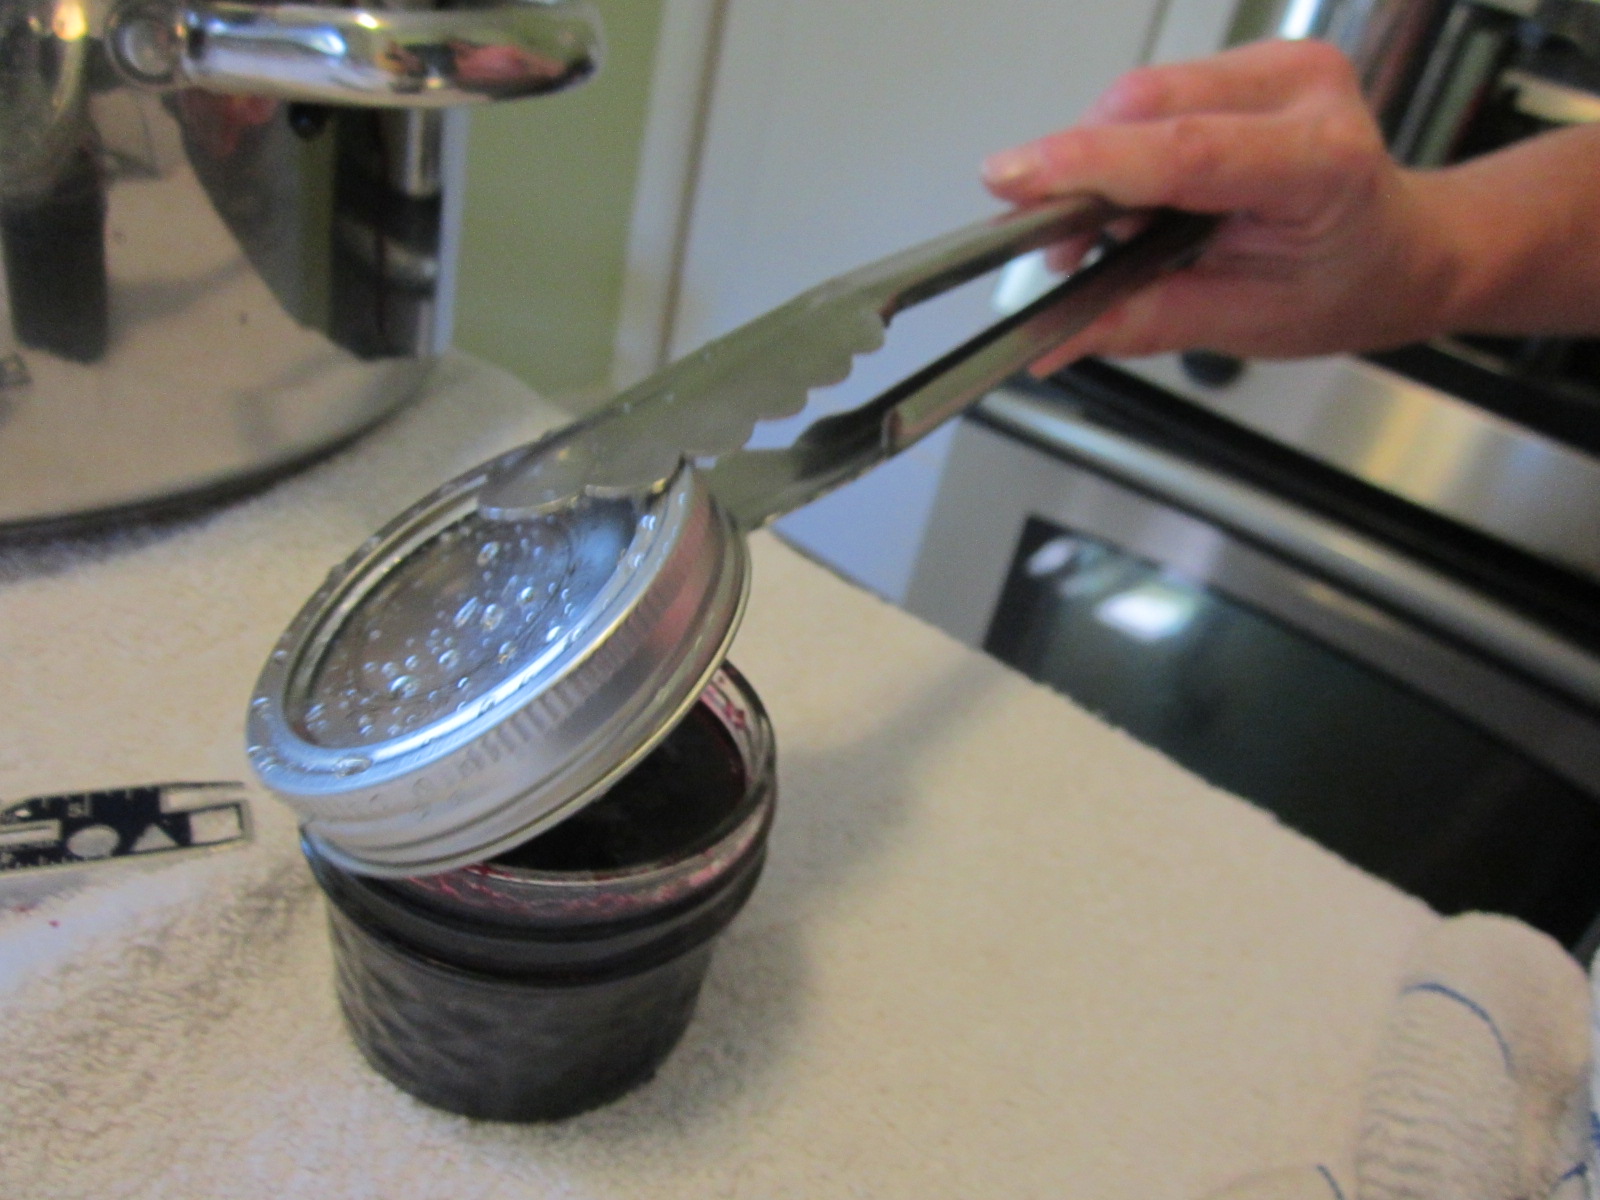
Use the tongs to remove a lid and ring from the lid pot. Place it on the jar.


Tighten the ring. Do not over tighten. There must be a means of escape for the air in the head space. I've read some recipes that call this finger tightening.


Complete all the jars. Use the jar lifter to pick up each jar and place in the boiling water bath. Be careful to keep the jars level so that the jam doesn't touch the lid. Again, this can impair the seal and also, the lids often have BPA, so I like to reduce contact. For this batch, all my jars fit into the boiling water bath. If are making a larger batch, you can hold the remaining filled jars in the oven until they get their turn.


I like wide mouth half-pint jars because I can stack them in my boiling water bath. I just have to make sure they are covered by an inch of water. This time, I had to add some extra hot water from my kettle.


Process in the boiling water bath for 10 minutes. This is pretty standard for jams and jellies. Follow the recipe for other types of products. Some must process for as long as 45 minutes. Do not have the water boiling rapidly. A gentle boil, with a bubble or two rising several times per minute is enough.


When the 10 minutes are over, turn off the heat. Use the jar lifter to remove the jars from the water and place on a towel lined pan. Again, keep the jars level. There will be water on each lid and you may be tempted to poor it off. It will either evaporate or you can wipe it away after the seal has popped.


Allow the jars to sit undisturbed until each one seals. The lids will making a popping sound as the vacuum pulls the lid down. The lids start with a convex bump that becomes concave when the seal is formed.


After the seal has formed, you can gently wipe the water off the lids. I also like to remove the rings so that they will dry overnight. If you leave the lids on, they may trap water and rust. Some people like to store their jars without the rings for this reason. I live in an arid environment and I have found that I can store them with the lids as long as they've dried thoroughly. You can store your jam in a cool, dry place for about two years. I always label with flavor and date so I can track the expiration and rotate so the oldest jams get used first. Also, take my word for it, at least make a note on each finished tray so that you know what it is. If you make blueberry and blackberry on the same day, you won't be able to tell which is which.


Here is a big scoop of this delicious jam on my morning yogurt. 
I hope this set of instructions will encourage you to try jamming in your own kitchen!

Special thanks to Katy!