Friday, January 28, 2011

Random Food Fridays - Sweet and Sour Meatballs

I've been making these meatballs for so long, I really had to think hard about where it all started. I've been making these since I was a teenager at my folk's house. The original recipe was from The Betty Crocker Recipe Card Library. You could subscribe to the recipes and they would send you a new set of cards every so often. They even came with a cool yellow plastic recipe file. I don't know if my mom still has the file. I currently have one card left out of that set -one of my dad's favorites, Cheeseburger Pie.

It's been so long since I saw that old recipe card that I've probably changed it all around by now. Please feel free to add any veggies you like. I always added green bell peppers for my folks. Mr. Dwayne views bell peppers as one of those fundamentally polluting foods, so you won't see them in things I serve to him.

Sweet and Sour Meatballs
1 1/2 lbs. ground turkey
1/2 cup dry bread crumbs
1 large egg
2 tbsp. chopped dried onions
salt and pepper to taste
1/4 tsp. garlic & herb seasoning
1/4 tsp. ground ginger
1 20 oz. can pineapple chunks packed in pineapple juice, drained, juice reserved

Sauce:
Reserved pineapple juice
1/3 cup packed brown sugar
1/3 cup apple cider vinegar
1 tbsp. soy sauce
1 tbsp. cornstarch

Preheat oven to 400 degrees. Combine ground turkey, bread crumbs, egg, dried onions, garlic and herb seasoning and ground ginger. (I like to stir with a carving fork because everything will combine nicely but the meat will not become compacted.) Form the meat into meatballs that are about 1/4 cup each. I usually get 14 meatballs. Place the meatballs onto a greased or lined baking sheet, making sure the meatballs do not touch one another. Bake in the hot oven for about 20 minutes or until browned and the internal temperature reaches at least 160 degrees.

While the meatballs are baking, make the sauce. Combine all the sauce ingredients in a large sauce pan. Whisk until the cornstarch is dissolved. Cook over a medium-high flame until the sauce thickens, bubbles and becomes translucent. Add the pineapple chunks and keep warm until the meatballs are ready. Carefully move the meatballs from the bake pan into the sauce and fold to insure everything is well coated with the sauce.

Serve with steamed brown Basmati rice.

Monday, January 24, 2011

My Family's Recipes - Grandma Betty's Square Bottle Dressing

At Christmas time, I wrote about receiving my in-law's family cookbook. You know, the one with all the tattered and stained pages, held together with a rubber band, representing the family's food traditions throughout the years. I've been blessed to receive many of my family's heirloom recipe collections. Up till now, I've just tried to keep them safe. I do like to read through them from time to time, but I haven't really dug in and started cooking. Part of the reason is that the recipes are often little more than descriptive paragraphs or ingredient lists. Somehow the two don't often appear simultaneously for the same recipe.

I decided to start with something I know. I also know that all my relatives in SoCal and Oregon will appreciate getting some of these recipes that we all remember. Square Bottle Dressing is a French dressing made with Campbell's Tomato Soup. I'm not sure how this recipe came into the family, but my Grandma Betty and Pappy had it all the time. It's heavy on oil, sugar and salt, but it became almost a family joke that you don't mess with the recipe. If you change it, it won't taste the same. It came to be called Square Bottle Dressing because of the bottle. It's a cool old bottle with a mettle screw top. Each side has a fleur de lis design. The square bottle currently lives at my house because I've been refilling it.

We discovered one of our favorite uses for this sauce by accident. During the summer, one of our favorite quick weeknight meals is sliced tri-tip picked up from one of our neighborhood grills, served along side fresh tomatoes and cucumbers from the garden. Sometimes, if you're very lucky, some of that tangy dressing gets on your tri-tip. Yum!

What you see above is tonight's dinner. It's a simple salad with butter lettuce, parsley, avocado, grated carrot, shrimp, hard boiled egg and a sprinkling of sunflower seeds.
Here is the text that I found in Pappy's cook book. It looks like this book started out when Pappy was a hotel restaurant chef. There are many recipes for great big quantities. I can see the additions that Grandma Betty made. Grandma has a very even cursive hand. She still has better handwriting than most people I know. Even though we knew we could never change this recipe, it's clear that Grandma Betty did. The original calls for 2 cups of oil and only 1/2 cup of sugar. She replaced fresh onion and garlic with dried. I've stayed true to Grandma's recipe except for the reduction of salt. I suggest you start with 2 teaspoons of salt and taste before you add the third.

Grandma Betty's Square Bottle Dressing
1 can Campbell's Tomato Soup
1 cup oil
3/4 cup sugar
3/4 cup vinegar (I use apple cider vinegar)
3 tsp. salt (or 2)
1 tsp. paprika
1 tsp. pepper
1 tsp. dry mustard
1/4 tsp. garlic powder
2 tbsp. dried minced onions

Place all ingredients in a blender and blend until smooth and thick.

Thursday, January 20, 2011

Random Food Fridays - Red Curry

Yum! Yum! Yum! Yum!

I love Thai curries. Usually I leave their preparation to the professionals. Sacramento is a hot bed of yummy ethnic foods. My very smart daughter, Madelyn, has helped me to understand that curry can be more a matter of shopping savvy than spice expertise. She advised me to try Mae Ploy curry paste. I've used their green, and now their red curry pastes. They are both super yummy and I don't even have to know about all the mysterious spices that are in them. I know this isn't my usual stance on food, but dude, I just made delicious curry!
Mae Ploy and my lunch portions.

Here is what the package looks like. Please note that the red curry paste contains shrimp and is not vegan. The green curry is vegan-friendly. I used about 4 tablespoons of this paste for this recipe and it came out pretty darn hot. Use 1 to 4 tablespoons according to your preference. I do recommend some Thai iced tea to cool your mouth as you eat it. I love the Thai tea served at Thai Palace, on J Street, here in Sacramento. I finally asked them what kind of tea they use. The server was kind enough to show me the package. This is the brand they use. When I shop, I look for the pink tea cup on the package. What is hilarious to me is that this tea only has two ingredients: green tea and yellow dye #6. This tastes like no green tea I've ever had! I can only conclude that yellow dye #6 is totally scrumptious. Good thing I'm not a purist!

Red Curry
1 tbsp. oil
1-4 tbsp. red curry paste
1/4 of a large onion, peeled and cut into slivers
1/4 sliced celery
1 13.5 oz can coconut milk
1 cup canned tomato chunks with some juice
1 20 oz. can pineapple chunks, drained
1 cup steamed caulifower
1 cup steamed carrots
(or 2 cups of your favorite leftover veggies)
2 tsp. sugar
1 cup frozen peas
1 cup frozen shrimps

Heat the oil in a large skillet and add the curry paste. Stir in the curry paste and cook it in the hot oil, stirring constantly, until it becomes fragrant. This should only take 30 seconds or so. Add the onions and celery and cook for a few minutes to soften lightly. Add the remaining ingredients except the peas and shrimps. Heat through over medium heat. Add peas and shrimp and continue to heat over a medium-low flame until the peas and shrimps are hot. Serve with steamed brown basmati rice.

Makes 5 servings of 1 1/2 cups each
403 calories per serving

Monday, January 17, 2011

Kiwi Fruit Jam

This is one of those jamming projects where I learned a whole lot, sometimes painfully. Two weeks ago, I gave in to temptation and bought a 10 lb. bag of kiwi fruit from a local grower who sells at our farmer's market. While I worried that I wasn't getting to them in a timely manner, two weeks turned out to be just what they needed to ripen and soften.
This is not my first time with kiwi fruit. Last year's jam seemed to hold on to the bright green color a little more. Because I had so much fruit, I prepped the fruit on the evening before jamming day. Perhaps letting the fruit sit overnight changed how it retained color when cooked. I'm not sure, because it looked just the same when I pulled it from the refrigerator. Also, peeling and cutting this fruit for more than an hour led me to discover something else about kiwi - it contains a protein dissolving enzyme called actinidin. Towards the end of my chopping, my left hand really started to sting. I had been chopping the peeled fruit on a chopping board and scooping it up with my left hand to drop in the big measuring cup. Somehow, the knuckles that rubbed across the board upon each scooping ended up bleeding and without a layer of skin. I promise that I did not get any blood in the fruit used for this jam. I found out about the enzyme later when I Googled kiwi fruit trying to figure out why it hurt my skin. Next time I will break out my trusty disposable latex gloves!

One of the challenges with kiwi fruit is that is has quite a bit of air in the cell structures. You can see that it foamed up like crazy. Unfortunately, the foam was well integrated with the fruit chunks and I removed a lot of fruit while trying to remove the foam. I don't generally use the butter trick to keep the foaming down, but I tried it on one of these batches and it didn't help at all.
The other challenge with airy fruit is floating. The jar on the right shows how all the jars looked after coming out of the boiling water bath. After boiling and skimming the jam, I stirred it for several minutes and it looked like the fruit had distributed evenly. However, the BWB left it separated. I did the one thing I know how to do and that is tip the jars a few times as the sealed jars cool. They are still sealed and I think they will be OK. My Internet research has revealed that sometimes floating happens, even when you follow every instruction for every trick in the book. One thing I did learn is that crushing fruit, as opposed to chopping, may help. I did chop these batches, thinking I'd maintain more of the pretty kiwi fruit sun-burst design. The cooked product might as well have been crushed. If I make this again, I will give crushing a try.
The good news is that this weird looking jam is pretty darn tasty. It is tart and the seeds offer an interesting crunch. I keep thinking that maybe it will be good for kids - Frog's Eggs Jam.

I used the cooked jam recipe for strawberries on the Sure Jell low and no sugar variety in the pink box, substituting an equal amount of prepared kiwi fruit for the strawberries. I tested with my litmus strips and confirmed, with online research, that ripe kiwi fruit have a safe PH for water bath canning. They are usually between 3.2 and 3.3. My 10 lbs. of fruit resulted in 16 cups of chopped fruit. I used 6 cups each in two batches, and then used the final 4 cups mixed with crushed pineapple for the Kiwi/Pineapple jam shown in the far left jar in the picture above.

Kiwi Fruit Jam
6 cups chopped (and crushed) ripe kiwi fruit
4 cups sugar
1 package Sure Jell pectin, low or no sugar variety

Prepare boiling water bath, jars and lids. Each batch will make about 7 pints.

In a small bowl, mix the pectin with 1/4 of the sugar. Stir into the fruit. Place the fruit in a heavy bottomed pan and bring to a boil. Watch carefully and stir frequently. When fruit comes to a full rolling boil, add the remaining sugar and stir to combine. Return to boil. Once a full rolling boil has been reached, boil for one minute. Remove from heat and skim away foam. Stir the jam for 2-5 minutes to help distribute fruit. Carefully ladle jam into prepared jars and seal. Process in a boiling water bath for 10 minutes.

I hope your fruit won't float, but if it does, gently turn the sealed jars a time or two as the jam cools. So far, I have had good luck with this and have not lost any seals. If any of you out there knows of some compelling reason not to do this, please let me know!

Now, I have to come up with some recipes that will help me use up the big bowl of froggy-green foam that I skimmed from my batches!

Friday, January 14, 2011

Random Food Fridays - I love you Medaglia d'Oro!

I've had a relationship with coffee for some time now. I am fussy about it, but not in the usual ways food people are fussy about it. Some people look at coffee like some people look at wine. They can taste subtle variations based on source location, roast and brew method. My palate is not that developed. I don't like it burnt. I don't like so-called creamer. I like plenty of high-fat dairy products. Fresh and hot please. That's about it.

I was introduced to Medaglia d'Oro through Baking in America by Greg Patent. His Chocolate Espresso Layer Cake changed the way I look at chocolate in baked goods. I now use Medaglia d'Oro in just about all chocolate based desserts. I think it adds a toasty bite that deepens the flavor and brings even the creamiest dessert a dark chocolate character. Mr. Dwayne views coffee as one of the polluting flavors, but when I bake with Medaglia d'Oro, he only detects deliciousness.

Try this for winning literal brownie points at your work or social event: Make lots of brownies using the Ghirardelli Triple Chocolate Brownie Mix from Costco. Simply substitute melted butter for the vegetable oil, add a tsp. of Medaglia d'Oro to each 1/3 cup of water, and add 1 tsp. of good vanilla for each pouch used. People go crazy for these. They will think you are a genius. I don't typically used boxed mixes, but for mass quantities, this is a great enhancement.

Medaglia d'Oro is also a cheap girl's dream. A couple of heaping teaspoons in a mug with a little sugar and plenty of half and half and you have a smooth, creamy homemade coffee house style drink. I don't steam the half and half, so I don't think I can call it a latte, but it sure is good. Medaglia d'Oro is the only instant espresso that I have tried that actually produces it's own crema when boiling water is added. Medaglia d'Oro is now my morning coffee, and often my afternoon iced coffee. My neighborhood, family-owned, grocery store started carrying it after I requested it. I don't think I'm the only one who loves it because they sell out often.

Not local. Very processed. BUT, multipurpose and delicious! Ciao!

Sunday, January 9, 2011

Orange Marmalade

Last year, around this time, I decided to learn how to make orange marmalade. I Googled for a recipe, and to my great joy, I found the January 2010 Citrus Can Jam Roundup. When I found the Can Jam, I found tons of great recipes and ideas. I also found a growing canning community, plus all their foodie friends. As they say, the rest is history.

I admit that I had some misses when first learning to make marmalade. My first batch was bitter and never set. I dumped it out, reboiled and re-canned it and it came out hard and rubbery. My lime and ginger marmalade turned out so bitter as to be inedible. But, there were also (eventually) successes. In fact, this little blog's inaugural entry shared one such success - Lemon, Pineapple and Rosemary Marmalade. Now I'm sharing my version of orange marmalade. The recipe is a bit fussy, but these ingredients and methods have given me results that I love. I will try to be as clear and concise as I can, so if you are embarking on canning and this is one of your first experiments, you will benefit from my errors.

The methodology for this recipe comes from Food in Jars Three Citrus Marmalade. Food in Jars is a great place for a new canner to start. The oranges you see here come from our local farmer's market and from my friend Carol's tree. She generously gave me two big shopping bags full of these beautiful organic oranges. Today I made three batches of orange marmalade and one of orange, pineapple and ginger marmalade. I only used about half of the oranges I had on hand!
This recipe uses 10 medium to large oranges and the juice of one lemon. I have a tool that peels a thin layer of zest and cuts it into strips at the same time. Once I've removed the zest, I cut away the peel and cut the orange segments away from the membranes. By avoiding using any of the white part of the orange, my marmalade ends up tasting more like candied orange peel than the usual bitter marmalade.
Ten large oranges yields a little less than two cups of zest strips and about 4 cups of juice and orange segments.
The orange zest is simmered with 6 cups of cold water, then drained, reserving the liquid. The Segments and lemon juice are combined with the softened zest and up to 4 cups of the simmering liquid. Six cups of sugar is added, then it's time to boil.
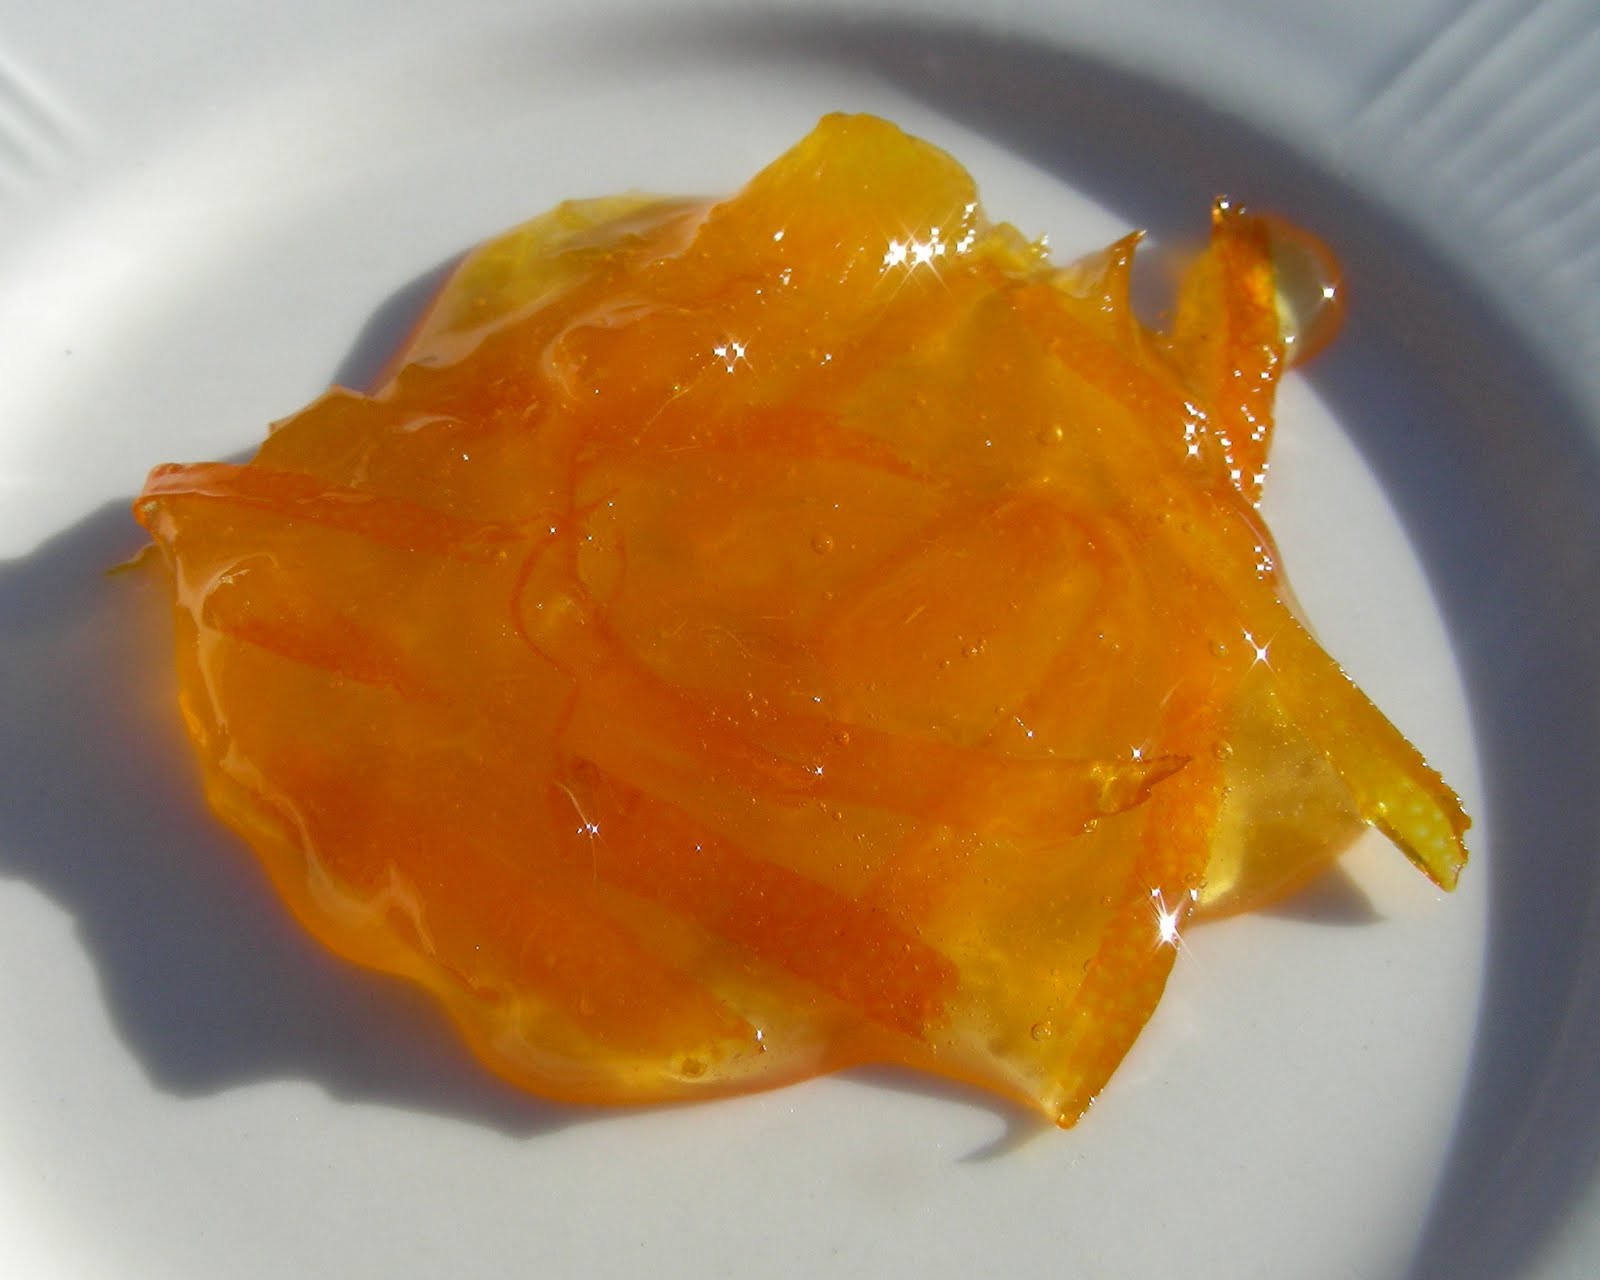
It may take about 40 minutes of boiling for the marmalade to reach the right consistency. I use my stirring spoon to make a little rest for my thermometer. An accurate thermometer is a great tool, but I have found that many thermometers can be unreliable. Once my marmalade reaches 222 degrees, I begin to watch it carefully and will stir and retest. I also test with a frozen saucer. Whenever I start a preserving project, I put all my saucers in the freezer. When the preserve comes up to 222, scoop out about a teaspoon and place it on the frozen saucer. Let it cool for about a minute and run your finger through it. For a jelly, it should wrinkle a bit. I've had enough hits and misses that I'm getting pretty good at recognizing the right texture. For my thermometer this is around 224 degrees. So use the thermometer as a starting point, but test the texture for yourself.
Here is my bright and fragrant orange marmalade. I'll be sharing some variations in the near future. Enjoy!

Orange Marmalade
10 medium to large oranges
1 lemon
6 cups sugar

Prepare jars and boiling water bath.

Remove zest from oranges and cut into thin strips. The zest from 10 oranges should equal a little less than 2 cups, not packed. Place the zest and 6 cups of cold water in a medium sauce pan. Bring to a boil and simmer for 30 minutes. Drain, reserving liquid.

Cut remaining pith away from oranges. (You may want to get your knives sharpened before this project.) Cut orange segments away from the membranes. Collect juice and segments in a large measuring cup. Add the juice of one lemon. You should have just about 4 cups of juice and segments. Do not worry if it is slightly less.

Place juices, segments and softened zest in a large stock pot. Add up to 4 cups of the zest simmering liquid. If it has reduced down to less than 4 cups, just add what is left. Add 6 cups of sugar. Bring to a boil, stirring to dissolve the sugar. You need not stir the marmalade constantly, but keep a close eye on it. Set up your thermometer and check it periodically, whenever you stir. (I usually break down the oranges for the next batch while this boiling takes place.) Once the marmalade reaches 222 degrees, stir and keep checking that the temperature remains at 222 degrees. Check the set by placing a teaspoon of the marmalade on a frozen saucer. After 1 minute, push the marmalade. If it wrinkles or mounds up, it is ready.

Remove the marmalade from the heat and stir for at least two minutes. This is very important for the distribution of the bits of zest and orange. You will see the bits begin to sink.

Carefully fill hot, prepared jars, leaving 1/2 inch head space. Wipe rims and seal. Process in a boiling water bath for 10 minutes. After 10 minutes, turn off the heat and wait 5 minutes. Carefully lift jars out of the water and place on a towel lined tray. Allow to cool over night. Check for seals and label.

Makes four 12 oz. jars.

PS. Really hoping to join the 2011 Can Jam!!!
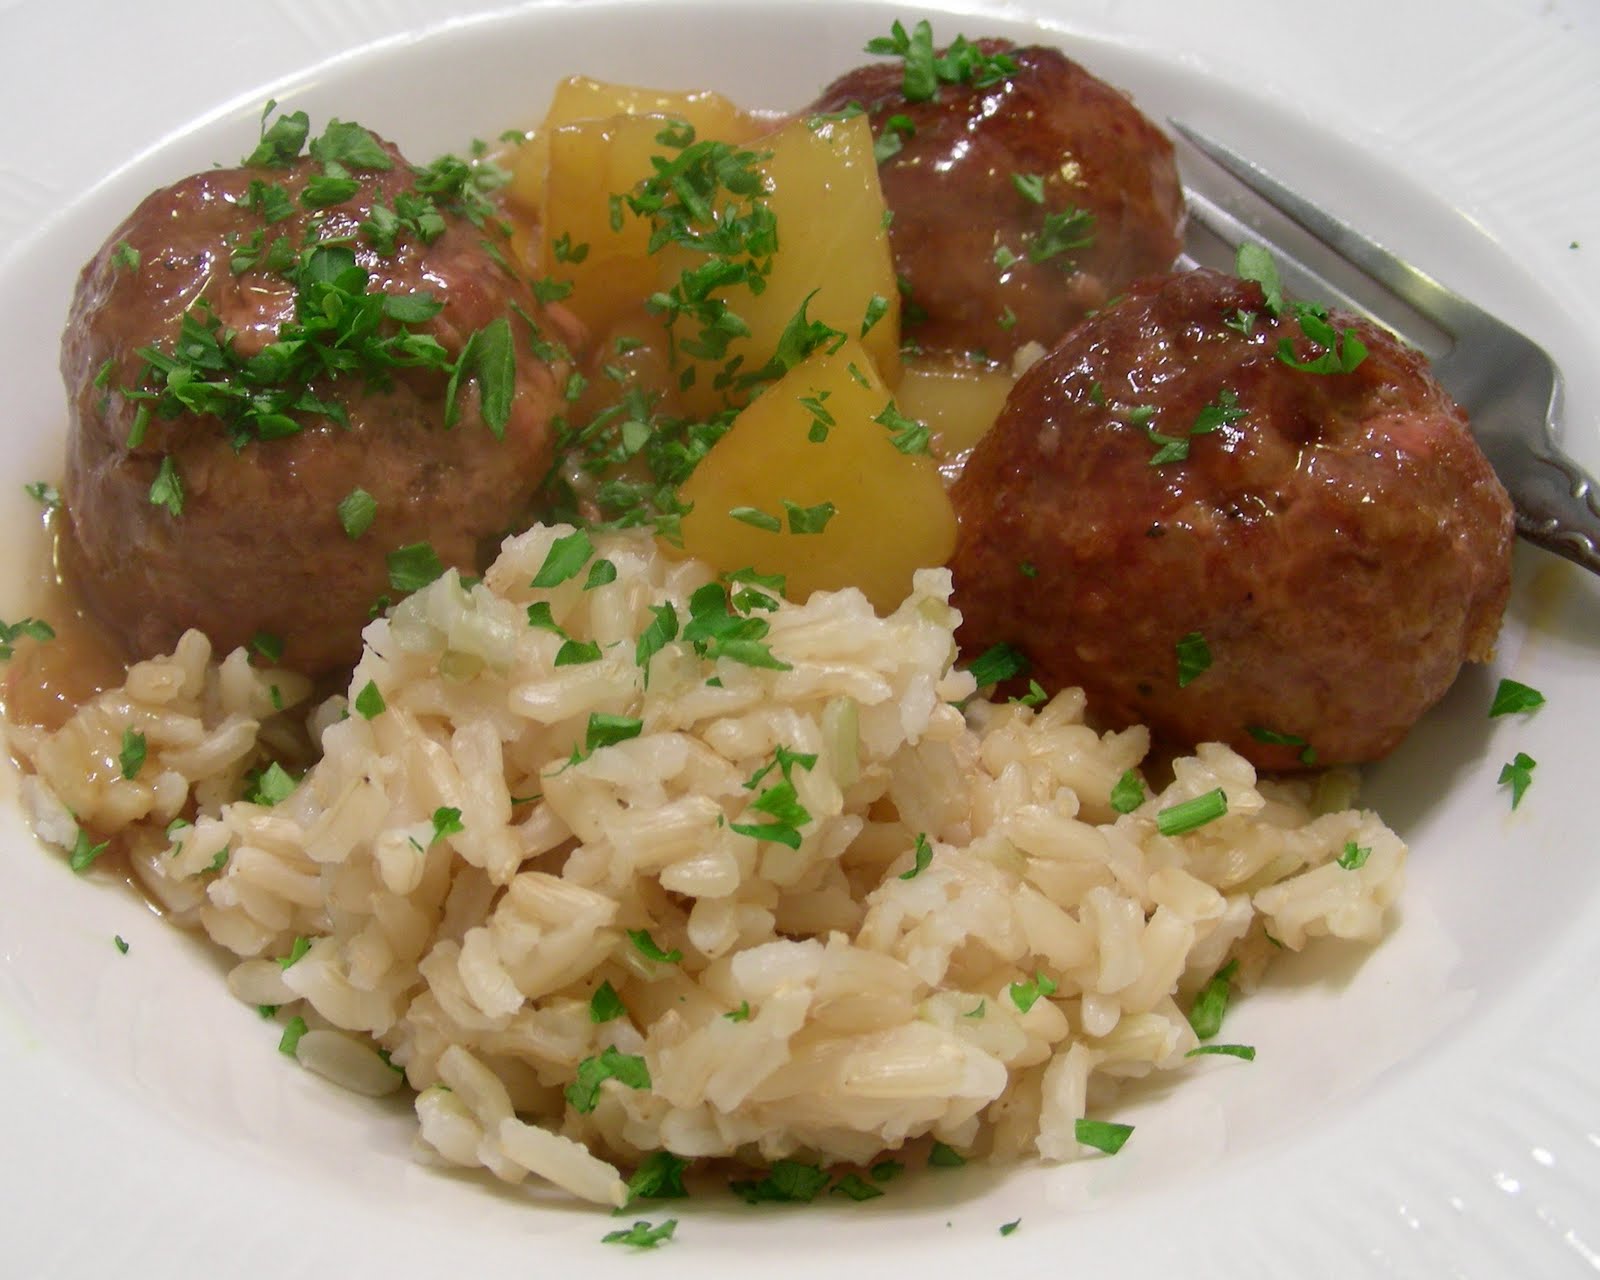
Friday, January 7, 2011

Random Food Fridays - Quiche

Quiche is one of those foods that's almost too good. You know - buttery pastry, eggs, rich and creamy cheeses - it's an eggy, dairy delight! Quiche is also supremely variable. Once you've perfected your crust and established your custard, you can use any combination of meats, vegetables and cheeses that you desire. The recipe I'm sharing with you today is basic but delicious. I hope you will try it.


Quiche
2 1/2 cups grated cheese (I used my favorite blend of Italian cheeses from Trader Joe's)
3/4 cups diced ham
1 tbsp. butter
2 shallots, diced
3 eggs
1 cup half and half
1/2 cup sour cream
1/4 cup chopped fresh parsley
1/2 tsp. salt
3 tbsp. flour
freshly ground pepper to taste
Preheat oven to 425.
Roll out dough and line a pie or tart pan. Set aside.
Saute the shallots and ham with the butter in a small skillet. Remove from heat as soon as shallots have softened. Sprinkle 1 cup of the grated cheese in the prepared crust. (When the cheese melts it acts as a moisture barrier between the crust and the custard.) In a large bowl, whisk together the eggs, half and half, sour cream, parsley, salt, flour, pepper. Stir in 1 more cup of cheese and the ham and shallots. Carefully pour into the prepared crust. Sprinkle with the remaining 1/2 cup of cheese.
Place in the preheated oven and bake at 425 for 15 minutes. Reduce oven to 350 and bake for 30 minutes longer, or until a thin knife inserted in the center comes out clean. It may still jiggle a bit. Allow to cool 10 minutes before serving.
Makes 6 servings.

Tuesday, January 4, 2011

Elk Stew

My dad is a great outdoors man. At 70 years old, he still hunts and fishes. He knows animal behavior and habitat and approaches every kill with respect. I am lucky to have grown up in a hunting and camping family. I never took up hunting or fishing, but I do love camping. Everyone in my family has a deep feeling for Nature, even if we enjoy it in different ways. I am lucky that I grew up knowing where food comes from. So many kids today think food comes from the store. A few years ago, one of my friends had a 14 year old visitor to her garden. This girl was from an inner city school and was amazed to see that fruits and vegetables come from plants! This is a sad disconnect from the world that sustains us. I also have to wonder what the heck those kids were learning in science class. Did they even have a science class?

I'm very pleased to report that my dad has recently gifted us with a large lake trout (Delicious!), antelope sausage, ground elk and this elk stew meat. I prepared this elk stew in the same way I prepare beef stew. The meat is very lean. I found that it became tender much faster than beef stew meat. I usually simmer beef stew meat for 1 1/2 to 2 hours before it reaches the desired tenderness. This elk was tender after about 45 minutes.

If you are interested in wild caught and foraged foods, check out Hunter, Angler, Gardener, Cook by Hank Shaw. His blog is beautiful and fascinating.

Elk Stew
1 lb. elk stew meat
2 tbsp. olive oil
1 cup diced yellow onion
1 large clove of garlic, minced
8 oz. sliced mushrooms
2 cups red wine
1 cup water
1 cup sliced celery
1 1/2 cups sliced carrots
4 cups cubed potatoes
1 cup frozen sweet corn
1 cup frozen sweet green peas
2 more cups of water
salt and freshly ground pepper to taste

Heat the oil in a large stock pot. Add the stew meat. Season with salt and pepper. After the meat has browned on all sides, add the onions, garlic and mushrooms. Saute until the onions and mushrooms have softened. Add the wine and 1 cup of water. Bring to a boil then reduce heat to a simmer. Simmer until meat becomes tender - about 45 minutes.

While the meat is simmering, prepare the other vegetables. Add the celery, carrots, potatoes and the additional two cups of water. Increase heat to return to a simmer. Simmer for about 20 minutes, or until veggies are tender. Taste broth and add more salt and pepper to taste. Add the frozen corn and peas. Return to a brisk simmer. When the frozen veggies are done, your stew is ready to serve.

This recipe made 10 1/2 cups and is 167 calories per cup.