Saturday, August 5, 2017

Random Food Fridays - Roasted Dinner Template


Here in Sacramento, summer days can reach "a hundred and sh*t" degrees" as Mr. Dwayne so colorfully called it. We seldom use our oven during the summer months, but some summer fruits and veg demand that we shut the kitchen door and just turn it on. Think about it - pie, cobblers and crumbles are just a few of the reasons to risk a heat stroke. This dish is a savory reason to turn on your oven. Luckily, it will only be on for about 30 minutes and then you will have a yummy dinner to take to other, the more temperate, parts of your home. 


One of the beautiful things about this dish is that it is really a method by which you can use nearly any set of flavors. In this example, I have used Indian flavors - chutney and yogurt marinate and veggies tossed in olive oil and a spicy curry powder seasoning. Look below for a list of flavor profiles that will serve you well.


I have used 4 boneless, skinless chicken thighs for this recipe. They cook perfectly in a 400 degree oven in 25 minutes. The summer vegetables I've used are cut into pieces about 1 x 1/2 inch square. These also cook to just tender-crisp in 25 minutes. You could also use this method with other cuts of meat or bone-in chicken, but it may take a bit longer and you will have to adjust the veggie size to compensate. I give you permission to experiment!


If you have not used parchment paper before, put it on your shopping list right now. Nothing sticks and clean up is easy-peasy. Mr. Dwayne appreciates this a lot! Another thing he appreciates is that, if you split this recipe down the middle, it is less than 500 calories for a plate full of yum.


Roasted Dinner - Indian Flavor
4 Boneless, skinless chicken thighs
1/4 cup plain yogurt
1 tbsp. coriander and garlic chutney

6 cups mixed veggies (summer squash, cherry tomatoes, 1/2 large sweet onion, 1 red bell pepper)
2 tbsp. olive oil
1/2 to 1 tsp. curry blend or garam masala
salt and pepper to taste (a couple of good grinds of each)

Combine the chicken, yogurt and chutney and massage it a bit to combine and completely coat the chicken. Let stand in the refrigerator 4 hours or over night. (Longer is better.)

When you are ready to cook, pre-heat the oven to 400 degrees and use the convection roast setting, if you have one.

Wash and dry the veg and cut up into pieces that will all cook in about the same amount of time - mine were all cut to just about match the size of the cherry tomatoes. Toss the veggies with the olive oil, curry powder and salt and pepper.

Line a baking sheet (one with a edge) with parchment paper. Place the chicken in a single layer down the middle of the baking sheet. Place half of the veggies on each side of the chicken. Roast in the pre-heated oven for 25 to 30 minutes, depending on the thickness of the chicken. What you see here was done in 25 minutes.

This serves 2 people at my house. Maybe 4 at yours.


Other Flavors:

Chicken Marinade                                                 Veggie Seasoning (Olive Oil + S&P)
Artichoke tapenade, lemon juice,                          Garlic & herb and Italian seasoning
Olive oil and garlic

Lime juice, cumin, ancho chile powder,                Cumin, garlic and herb seasoning, squeeze of lime
garlic, olive oil, salt & pepper, a little sweetener

Teriyaki sauce + extra garlic and grated ginger     Garlic & herb seasoning , 5 spice powder

Favorite vinaigrette with smoked paprika              Garlic & herb seasoning and smoked paprika

Let me know if you think up any more!


Monday, June 5, 2017

Mulberry and Lime Jam


Our drought-busting winter has borne many sweet fruits. It is hard to believe how lively things can feel with green grasses left on the hills and moisture remaining in the air. This is June and I have seen bogs and ponds in the Bay Area and wild flowers remaining in the valley. Everything (including me) feels refreshed and ready to engage in enthusiastic growth. This wonderment of water has resulted in lots of big, juicy mulberries.

Mulberries used in landscapes are usually fruitless. I get this. These berries are loved by birds and other wildlife and lead to masses of purple poo. In fact, my father-in-law drove me around in a golf cart to pick the berries you see here. I used to go out with an old sheet, plastic bags over my feet and covered from head to foot to pick these. We would shake the tree and let them fall into the open sheet. This is still a fast way to get lots picked, but we chose for tidy rather than quick. Even so, I got one stuck in one of the treads in my sneakers and made quite a mess before I got it all out.


 Mulberries have a unique flavor and aroma. The seeds are small and crunchy, rather like fig seeds. They are sweet and not acidic, so additional acid must be added to make them safe for canning. I decided to use lime as a companion flavor and acidifier. There are no directions for using mulberries on the low sugar Sure Jell direction sheet, so I loosely followed the directions for blackberries, which these resemble. However, when I mashed them, they did not release very much juice, so I added 1 cup of water along with 1 cup of fresh squeezed lime juice.


So, aside from the purple-poo-stain factor, these berries have one other problem - tiny stems that cling with a bond much stronger than the berries themselves. When they break away from the tree, the little stems remain attached. I have found that if I try to pluck the stems off, I just end up with a hand full of crushed fruit. So, today, I sat and listened to an audio book and snipped them off with a pair of scissors. It's well worth the effort.

Sunday Jam = Monday Toast

Mulberry & Lime Jam
4 cups stemmed and crushed mulberries
1 cup freshly squeezed lime juice
1 cup water
4 cups sugar
1 package of reduced sugar Sure Jell

Prepare 8 jars, lids and rings and the boiling water bath.

Combine the fruit, lime juice and water in a large pot. Combine 1/4 cup of sugar out of the four cups sugar and mix it with the pectin powder. Stir into the fruit and bring to a boil. Once boiling, add the remaining sugar and return to a boil. Boil for one minute and remove from heat. The Sure Jell packet directs that the mixture be brought to a full rolling boil - one that cannot be stirred down. I found that this jam thickened quickly and brought it to a simple boil and boiled for one minute. The set is perfect.

Skim and foam. Ladle into hot, sterilized jars. Wipe rims and top with lids and rings. Tighten just to finger tightness and process in the boiling water bath for 10 minutes. Carefully remove to a towel-lined tray to cool. Let stand overnight. Wipe the jars of any remaining moisture and label.

Makes 7 1/2 Half-Pint jars

Friday, April 21, 2017

Random Food Fridays - Ground Turkey Stir Fry

 Cabbage and Ground Turkey, for the WIN!

Since Mr. Dwayne is off of carbs, this has become one of our frequent weeknight dinners. It can be made with any kind of protein, but we especially like the ground turkey. I tend to use whatever veggies I have available, but cabbage is a must.


What makes this dish special is the sauce. It's a weird amalgam of Americanized Asian flavors that really works. Change everything else, but keep the sauce in tact. (You won't mind having all these good things on hand! I promise!)

This makes 3 servings at 500 calories each.

Ground Turkey Stir Fry

For the Sauce:
2 tbsp. soy sauce or Tamari
2 tsp. Worcestershire sauce
2 tbsp. Ponzu
1 tbsp. Yoshida sauce (think teriyaki syrup)
2 tbsp. catsup
1 tsp. Sesame Oil
1 tsp. fresh grated ginger
2 cloves garlic, peeled and crushed

Stir and set aside.

For the stir fry:
1 lbs. ground turkey
1/2 a yellow onion, sliced
2 carrots, sliced thin on a diagonal
6 cremini mushrooms, cleaned and sliced
1/2 head of green cabbage, cored and roughly chopped

1 tbsp. arrowroot or cornstarch and 1/4 cup water, if needed to thicken


Heat your wok or a large skillet on high. Spritz with some non-stick spray or coat with a thin layer of peanut oil. Add the ground turkey and break it apart with a spatula. Add the sauce and stir through. Add the onions, carrots and mushrooms. Stir and cook until the onions are just getting translucent. Add the cabbage. Cook just a few minutes more, until the cabbage is tender-crisp.

If your veggies have released a lot of juice, make a quick slurry with either arrowroot or cornstarch and cold water. Mix until no lumps appear. Add to the stir fry and toss over the heat until the sauce has thickened. This takes only moments.

Serve immediately sprinkled with sesame seeds. Add cashews if you want to live it up!


Friday, April 7, 2017

Random Food Fridays - Crunchy Ham and Pea Salad


When I asked Mr. Dwayne if he liked jicama, he wasn't sure what I was talking about. "Hiccough wha???"

Turns out he likes it. He likes it a lot in this salad. With sweet peas and sweet crunchy jicama, you may be surprised to learn that the carbs in this salad are very reasonable. This recipe makes two meal-sized servings, each one coming in at 300 calories and 22 grams of carbs. Salty, sweet, crunchy and satisfying for around 300 calories? I'll take it!

The inspiration for this dish came from this recipe at eatfresh.org. I ran across this web site while doing some some research on CalFresh (the program formerly known as Food Stamps). My job entails a lot of research into the laws, rules and regulations around welfare programs. Much of what I do for my work entails taking dry legal jargon and turning it into something regular folks can understand. Imagine my delight when one click brought me to the colorful and fun EatFresh web site. I must confess that I spent a bit longer than necessary exploring all the good ideas.

I changed their recipe to my tastes and added cubed ham to make it a main course. I also used less lettuce. A chunky salad will hold up better, once dressed, than will a lettuce salad. It's easy to scoop some onto a bed of lettuce for serving rather than tossing the lettuce in with everything else. Likewise, you could serve this without any lettuce at all. I think that would actually be best for a pot luck.

Crunchy Ham and Pea Salad
1 cup diced ham
1 1/2 cups frozen sweet peas, thawed
1 1/2 cups diced English cucumber, do not peel
1 1/2 cups diced jicama, do peel!
1 tbsp. minced shallots

For the dressing:
1/2 a ripe avocado
juice of 1/2 a lime
1/4 tsp. salt
1/4 tsp. garlic & herb seasoning
2 tbsp. mayonaise

Dice the ham, cucumber and jicama into small cubes, all about the same size. Mince or thinly slice the shallots. Toss together and set aside.

To make the dressing, place all dressing ingredients into a bowl and use a fork to mash the avocado and mix until a smooth consistency is reached.

Toss everything together. Serve and enjoy!


Update - I took this to a pot luck and I would now recommend that you serve this with lime wedges and toasted pepitas. Yum!


Sunday, March 19, 2017

Blood Orange Mimosa Jelly


Here is my contribution to the March Food in Jars Mastery Challenge: 
Blood Orange Mimosa Jelly!


I favor jams, as they feature the distinctive texture of each fruit. Jelly is reliant on flavor alone to make it special. Sure the set may be a challenge, but the flavor is what will make it a star and make your lucky friends sink into pleasure when they taste it. This one is a winner. I'm excited to think about all the cocktails that may become delicious jelly! Margarita! Rose Garden! Mojito! As long as there is a citrusy tang to bring enough acidity to the recipe, it's a GO!


I purchased these beautiful blood oranges at my local farmer's market. Citrus and winter veg are still the primary offerings in early Spring. This recipe starts with 3 pounds of blood oranges and two Meyer Lemons. If you don't have one of those squeezy things, shown above, it is high time you do!

 That gave me about 2 1/2 cups juice, before straining.

 Strain the juice through layers of wet cheese cloth or a jelly bag. Be patient and just let it drip.

 Add Prosecco to equal 5 1/2 Cups. This took my whole bottle.
Use the directions for Grape Jelly on the Low Sugar Sure Jell Pectin and...

 Yum! 
It's so pretty too!

Blood Orange Mimosa Jelly
3 lbs. whole blood oranges
2 Meyer Lemons - about 1/2 cup juice
1 bottle Prosecco
(All to equal 5 1/2 cups total juice)
3 1/2 cups sugar
1 pkg. Low Sugar Sure Jell Pectin

Prepare 8 half-pint jars and lids and a boiling water bath. 

Measure the juices and Prosecco to equal 5 1/2 cups total. Place into a large pot. Measure 3 1/2 cups sugar. Remove 1/4 cup of the measured sugar into a small bowl and stir in the contents of the pectin packet. Stir the sugar and pectin mixture into the juice and bring to a boil. When it has reached a full. rolling boil, stir in the remaining sugar. Return to a full, rolling boil and boil for 1 minute exactly. Remove from the heat and skim any foam.

Ladle into hot, prepared jars and process in the boiling water bath for 10 minutes. Remove carefully and let stand, undisturbed, until the lids pop. 

Makes about 8 half pints.


The cook's reward!

Saturday, February 18, 2017

Mastery Class - Citrus Herb Salt


The Food In Jars Mastery Challenge for the month of February is salt preserving. I made two items for this challenge - salt preserved Meyer lemons and this citrus herb salt. From my facebook feed, I'm guessing that thousands of households across the world have salt preserved lemons for the first time. I won't post a recipe here because it is a process that is easy to find and duplicate. For me, the real challenge will be making food around those salt preserved lemons. I hope to share some of the successful uses here.

I decided to try an herb salt because I have really enjoyed dry brined poultry. The flavor components in this mixture are very similar to what I use when I dry brine turkey. Making the dry brine is a bit of a production, so I thought, Why not make it and dry it and have it ready all the time? 

Depending on the humidity in your home, when you make this, you may have to use your oven to help in the drying process. It has been very rainy and humid in my world, so I ended up using the oven once at the beginning of the drying and once again just to finnish it off. The mixture spent about a week in a back bedroom, near the furnace, in between. Leaving it out for a week did not reduce the flavor or aroma at all. It is wonderful!


You can use this to dry brine, by coating the meat and letting it sit in the fridge for a time. The thinner the meat, the less time it takes for the flavor to penetrate. These boneless, skinless chicken thighs were seasoned in the morning and then cooked after work. For a turkey, I will let it sit for several days. If you really coat the meat, you will want to rinse it of the excess salt and pat dry before cooking. If you sprinkle it lightly, like you would a seasoning salt, you can leave it on. 


These thighs got simply pan seared, until cooked through, and served with fried cabbage. Mr. Dwayne thought it superb.

Citrus Herb Salt
1/2 cup citrus zest - I used Meyer lemon and Satsuma mandarins
3 fat cloves of garlic
1 tbsp. minced dry onion
1 cup roughly chopped parsley - I included the stems
1/4 cup fresh sage leaves
2 tbsp. fresh rosemary leaves
1 tbsp. freshly cracked black pepper
1 1/2 cups coarse Kosher salt, divided

Place everything except 1/2 cup of the salt in a blender or food processor and process until well ground and blended. Remove from the processor and stir in the 1/2 cup of salt. (My Vitamix ground this so finely, that I wanted to add a little more granulated texture back into the mix. If your food processor is not so aggressive, you can add everything at once.)

Spread the mixture, in a thin layer, on a parchment lined cookie sheet. To dry, either set in a warm, dry  place until completely dry or assist the drying process by using your oven. I placed mine in the oven, at 200 degrees, for about 10 minutes, turned the oven off and left it in the oven until cool. I had to do this process twice.

If you have any of those little silicone sachets from some other food product, you can add it to the storage jar to prevent caking. This makes 2 1/2 cups of salt. I keep a small jar by my stove and the remainder in the fridge.

Monday, February 13, 2017

Meyer Lemon and Vanilla Jam

 Tired of marmalade? Need some zest for other purposes? This may be the jam for you!


I have a little dwarf Meyer Lemon in a pot on my back patio. It has been a hero the last couple of years, but seems to be taking a break. I had more than 40 lemons from it last year. This year, not so much. Lucky for me, my dear friends, Bill and Marina moved in to new home with their own Meyer Lemon tree and they brought me a giant shopping bag full! What you see in the photo above, is about half of what Marina brought to me a couple of weeks ago.

 Note to Self: Do not attempt to dry citrus peels during the monsoon season. Green mold will result.

I really like dried lemon zest for a number of uses. I use it in herbal teas and grind it up with salt for dry brining. It's just good stuff to have around. So, my plan was to use these lemons to make dried zest and frozen cubes of lemon juice. The tray above gave me a bunch of zest strips and one gallon size bag of cubes. I also had plenty left to make this jam. Unfortunately, the zest, left to air dry, picked up green mold and was a loss. California has been in a serious drought for over four years. This year, we're having major flooding. I now know that humidity makes a big difference when attempting to air dry. Sigh.

Yummy juice for later! 


The Meyer lemons I have used have been pretty soft when ripe. Unlike limes and Eureka lemons, they are very hard to cut into clean segments because of the softness and the number of seeds. To get around this, you need a very sharp knife and patience. I cut away the pith, then held the lemon upright and cut down so that the edges of the segments are removed from the tough, seedy center. Whenever you are cutting soft juicy fruits, do use a pan under your cutting board to capture the juice that gets away.

This batch takes 5 cups of lemon pieces and juice. This will take 10 to 15 lemons, depending on the size. I added some of my pectin booster to help the set and one vanilla bean. The vanilla bean softens and enhances the zing of the lemons and makes this jam beautifully aromatic.


Meyer Lemon and Vanilla Bean Jam
5 cups prepared Meyer Lemon pieces and juice
1 vanilla bean, split and scraped
1 cup pectin booster or a bundle of lemon seeds in a sachet
5 cups sugar

Prepare 7 half pint jars, lids and rings and your boiling water bath.

After preparing the fruit, add the split vanilla bean, pectin booster and sugar. (You may pop this in your refrigerator for up to a week, if you don't have time to do the processing on the same night you cut up the fruit.) If you wish to use a sachet of the lemon seeds, save them as you prepare the fruit and keep them separate from the fruit until you start the cooking process. If you don't mind a deeper bitterness from the seeds, you can throw them in earlier. Most of my fussy processes are designed to keep the bitterness at bay.

When you are ready to can, start your boiling water bath. Place the fruit mixture in a large pot and bring to a boil. Place a few saucers and tea spoons in the freezer for performing the "plate test" later.

If you are using pectin booster, be sure to watch your stove, as the apple pectin will often foam up more vigorously than plain fruit. When the jam comes up to 220 degrees, remove a spoon and saucer from the freezer and scoop out some of the jam. Place it back in the freezer for a couple of minutes. Turn the jam off or on low while you await the test. Remove the saucer and push the jam with your finger. If the surface wrinkles, it is done!

Remove the jam from the heat and remove the vanilla bean. Skim off any remaining foam. Sterilize the jars in the boiling water bath for 5 minutes and drain. Give the jam a careful stir to distribute the solids, then carefully fill the jars, leaving 1/4 inch head space. Wipe rims and top with lids and rings. Finger tighten and process in the boiling water bath for 10 minutes. Carefully remove from the boiling water bath and place on a towel lined tray. Leave undisturbed until they pop! Makes 7 half pints and some for your snack!


Sunday, February 5, 2017

Oat Bran Muffins - Lower Carb, All Real, All Good


In August of 2016, Mr. Dwayne was diagnosed with type 2 diabetes. It was not something that was on our radar, but probably should have been. We'd both gained weight over the last few years of extreme stress and deaths in our family. I have to admit, we often took what I call "The Ice Cream Cure." Hey, carbs work. Emotional eating happens because, in the short term, it works. 

I've always been for real food. Lots of fruits and veggies. I like to eat things that have some life force in them - things that have been alive recently. I thought our diet was pretty good. I do take time to cook from scratch on most occasions. But, then, mmmmm, the ice cream. 

I came of age cooking for my family during the low-fat craze. Some of my favorite recipes come from Jane Brody's Good Food Book: Living the High Carbohydrate Way. I learned about beans and rice and combining plant proteins. I learned how to use various whole grain flours and traditional baking methods from Laurel's Kitchen Bread Book - which remains a classic resource. While all this is pretty healthy, it doesn't suit the needs of my family now.

Now, I have to learn to cook a different way - fewer carbs, carefully selected, in small portions. 

My initial forays into the online world of "low carb" revealed a lot of meat and dairy and treats with artificial sweeteners. Some advocated "no carb" or "keto" - an extreme approach that seems to be about weight loss more than health. It all seemed out of balance to me. Yet, we needed to take action and improve my sweetie's health fast. 

We did eat more animal protein and dairy than usual. It made the first few weeks fairly painless for Mr. Dwayne, who did not have to give up his favorite foods. After a few weeks of this, I was dragging and cranky. Super low carb was not a viable or sustainable option for me. I added in a few more fruits and whole grains. Mr. Dwayne lost weight quickly. 

Here we are, 5 months later. Mr. Dwayne has lost 45 pounds and I have lost 20. I've been working on better fitness, with Zumba classes and a gym membership. Overall, we've found a better balance in our diet and we both feel better. The joke at our house is that cabbage is the new potato. 

The only thing that did not go well were Mr. Dwayne's cholesterol numbers. They went up 10 points in that 5 months. Not the good kind either. So, we had to change again. Minimal cheese and limited red meat and processed meat. Lots more veg. So far so good. 

I've been searching for a way to get more water soluble fiber into his diet. This type of fiber is proven to assist with heart health, gut health and in lowering cholesterol. The problem is, he hates beans and only likes oatmeal in the form of cookies. So, I set out to find a way to get him the fiber in a way that is full of flavor and nutrients and low in carbs. Most of the oat bran muffin recipes online have lots of sugar, plus white flour. Low carb muffins seem to all have artificial sweeteners. By combining a few recipes and doing a lot of testing, I think I finally hit the mark.


This recipe makes 12 muffins, which have 111 calories each, with 15 grams of carbs and 7 grams of sugars. According to the American Diabetic Association and his meals should have 45 to 60 grams of carbohydrates. The nutrition and diabetes management classes with our health provider suggest that each meal should be under 45 grams. Mr. Dwayne considers a serving for breakfast to be 2 muffins, keeping his carbs well within the 45 gram limit.

Because they don't rise as much as traditional cake-like muffins, you can fill the muffin cups nearly to the top. You can line the cups with papers or with non-stick spray. I like the crust, so I don't use the papers, even though clean up is easier that way.

Flat topped, but flavorful and moist. They are lightly sweetened with banana, blackstrap molasses and raisins - all highly nutritious foods. I know Mr. Dwayne will enjoy them. We'll find out how they work in the next few months!

Oat Bran Muffins
1/2 cup raisins plus boiling water
2 cups Oat Bran hot cereal
2 tsp. baking powder
1/2 tsp. salt
1 tsp. cinnamon
1 mashed ripe banana (about 1/2 cup)
2 tbsp. oil (I used olive oil)
2 tbsp. black strap molasses
1 egg
1 cup milk

Preheat the oven to 325 degrees. Line or grease a standard muffin tin.

Place the raisins in a heat proof bowl and cover with boiling water. Set aside.

Combine the Oat Bran, baking powder, salt and cinnamon. Set aside.

Mash the banana and add the oil, molasses and egg. Whisk to combine. Whisk in the milk. 

Drain the raisins. Stir the milk mixture and raisins into the oat bran mixture until moistened. Evenly distribute between 12 muffin tins. Bake in the preheated oven for 20 minutes. Remove from muffin tin to cooling rack immediately. Enjoy!


Sunday, January 29, 2017

Mastery Class - Grapefruit Marmalade with Honey and Mint

 Pretty, right?

I've made a lot of marmalade. I love it. I searched my blog and found I have made at least 7 varieties. I make new batches of most of them each winter, when the citrus fruits come in and the kitchen is cool. 

Marisa at Food in Jars has started a Mastery Challenge. I'm so excited, because I will get to refine my skills and learn new ones. The challenge for January is marmalade. I missed the deadline to make this an official entry, but I want to share it anyway. Next month is salt preserving and I'm already scheming. I'm grateful for the challenge to try new techniques. I may even screw my courage up enough to try pressure canning!

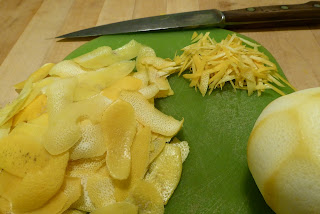
 I scrubbed the fruit, peeled the zest and sliced it thin.

This marmalade submission was delayed for the best possible reason - vacation! I spent two weeks of January on the Big Island of Hawaii. Ahhhh..... When I returned, I visited Ms. Paula and saw that the grapefruit tree behind her apartment building had dropped a bunch of perfectly nice fruit. We scooped them up and I took them home. Fast forward one week, when I finally had time to do something about this literal windfall. I lost about a quarter of what I had gathered to the bruises that has begun to mold. The bruises only became apparent over time. If I had prepped the fruit sooner, I would not have lost so much. (I'm taking this lesson to heart, as I have many dozens of Meyer Lemons in my kitchen even as we speak!)

 Combine the zest and 4 cups cold water.

 Bring to a boil and simmer for 20 to 30 minutes. 

 While the zest simmers, cut away the pith and supreme the fruit.

Grapefruits are more bitter than most citrus. The fruit itself is bitter, not just the rind. By simmering the zest, much of the bitterness will be removed. For this recipe, I discarded the simmering water. For less bitter fruits, I often add some of this simmering liquid back into the recipe.

I spent some time thinking about what flavors might enhance grapefruit. I thought about the mint I like in citrus salads. I thought about the way people sometimes broil grapefruits halves with sugar to make a kind of caramel topping. Then I thought about honey. Grapefruit, honey and mint! And, it worked!

 The prep happened one evening, then, off we went to bed.

After cooking, skim the foam and add the mint sprigs. They will add a bright flavor!

 Remove the mint sprigs. Stir gently, fill the jars and process in the boiling water bath.

Yum!

Grapefruit with Honey and Mint
About 10 Grapefruits - enough to result in 1 1/2 cups sliced zest and 4 cups segments and juice
4 cups Water
1 cup Honey
4 cups Sugar
1 Bunch of Mint

Scrub and dry the grapefruits. Peel just the zest. If your peeler is wide (like mine) stack and slice the zest. Place in a pot with 4 cups cold water and bring to a boil. Reduce heat and allow to simmer for 20 to 30 minutes.

Meanwhile, use a sharp knife to cut away the pith. Cut the segments away from the membrane. Do this with your cutting board inside a pan to catch the juices. Add the segments and juice to a large measuring cup. 

Drain the zest and rinse with cold water. Add to the segments and juice. You should have at least 4 cups total. Add the honey and sugar and stir. Cover and place in the refrigerator until you are ready to can. 

On canning day, prepare the boiling water bath and 6 half pint jars, their lids and rings. 

Place the prepared marmalade in a large pot. Bring to a boil and continue to boil, stirring occasionally, until it reaches 220 degrees or until it passes the cold plate test. This will take 30 to 40 minutes. 

While the marmalade is cooking, prepare the mint by washing it and tying it into a bundle with cooking string. 

Remove the pot from the heat and skim off any foam. Use tongs to place the mint bundle into the mixture. Submerge it and stir gently. Allow to steep while you sterilize the jars in the the boiling water bath. 

Remove the mint bundle and any leaves that may fall off. Stir gently to distribute the solids throughout the thick syrup. Fill the hot prepared jars, leaving 1/4 inch head space. Wipe the rims and cover with lids and rings. Process in the boiling water bath for 10 minutes. Carefully remove to a towel lined tray. Makes 5 half pint jars and a little left to use right away.


Friday, January 20, 2017

Radom Food Fridays - Fire Cider


Last year, after a bout of food poisoning, I caught everything. I had some kind of upper respiratory thing or another for nearly 6 months, including a bad case of bronchitis. I knew I had to get busy making myself well. My personal biosphere had gotten seriously out of whack. This is one of the things that really helped. I made this batch a few weeks ago, as Winter came in. By paying attention to my diet and exercise and consuming probiotics and this fire cider, I'm doing pretty darn well. There was a cold that went through my office like wildfire and I only had it in my nose for about 12 hours. I call that a win! Much better than last year!

There are many fire cider recipes around. I think it is best for you to make a concoction that suits your tastes and your needs. Some people add honey, for both its health benefits and flavor, but that just doesn't work for me. I was truly surprised at how much I like this fire cider as a savory ingredient. Mostly, I drink a tablespoon in warm water during my snack break at work. It is a lot like hot and sour soup and goes great with cheese and crackers. It also adds a nice zing to soups, sauces and salad dressings. It really is a kind of hot sauce and can be used in the same way.


Quality really counts here. Use only organic ingredients and use fresh, whenever possible. Your local health food store should have most of what you need. The directions will allow you to make a small or large batch. Purchase according to the size of your jar. The jar pictured above took 1 quart of ACV after being filled with the vegetables.

Fire Cider:
Equal Parts, by weight:
Garlic
Onion
Horseradish
Turmeric
Ginger
Red Hot Peppers (I used Jalapeno)
Whole Lemon

1 large bunch Italian Parsley
Bragg's Organic Raw Unfiltered Apple Cider Vinegar

Thoroughly wash a large jar with a tight fitting lid. Set aside. Peel the onion, garlic and horseradish. Wash all the other vegetables, but do not peel. Cut into 1/4 to 1/2 inch chunks. Slice through the parsley about every 1 inch, including stems. Make a single layer of each item, repeating until you have filled the jar. Pour in the ACV to cover. Close tight and shake. Set in a cool place and shake once per day for about two weeks. The liquid may get cloudy and a sediment may appear. Don't worry - that is the active vinegar.

After about two weeks, strain the liquid into a measuring cup. Store in a thoroughly clean glass jar in the fridge. (I usually sterilize the jar by pouring a hot kettle over it.) This will keep in your refrigerator for quite some time. I've never had it spoil before I use it up. Because of the high acidity, I think it should keep nicely for two or three months.

Here's to your health!